- Home
- Contact
- Restoration Gallery
- Services
- How to find us
- Triumph TR4A Restoration
- Triumph TR4 Restoration
- Triumph TR4 Restoration
- Triumph Herald V8
- Triumph Spitfire 1500 Restoration
- Triumph Spitfire MK4 Restoration
- Triumph Spitfire 3.5 V8 conversion
- Triumph Vitesse 2ltr Convertible Restoration
- Triumph Spitfire Mk3 Restoration
- Triumph Vitesse 2ltr Mk2 Body Restoration
- Triumph TR6 Restoration
- Jaguar E Type body restoration
- Triumph Stag Restoration
- Triumph Stag Restoration
- Morris Minor Van Restoration
- VW Type 2 Camper Restoration
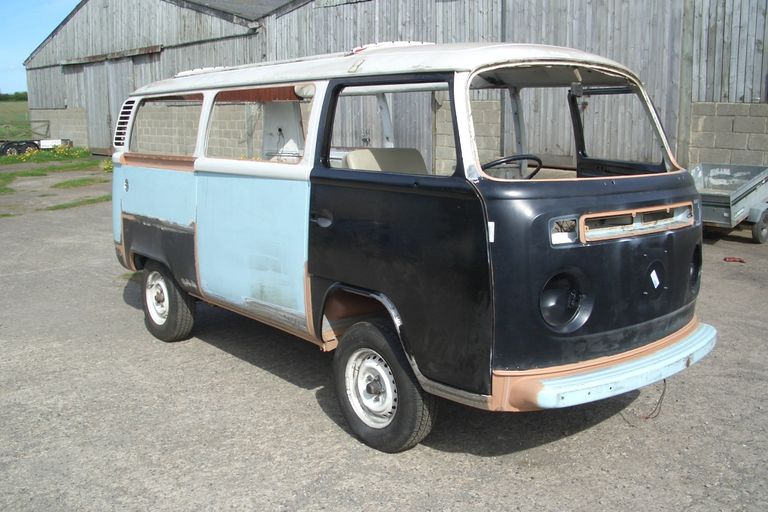
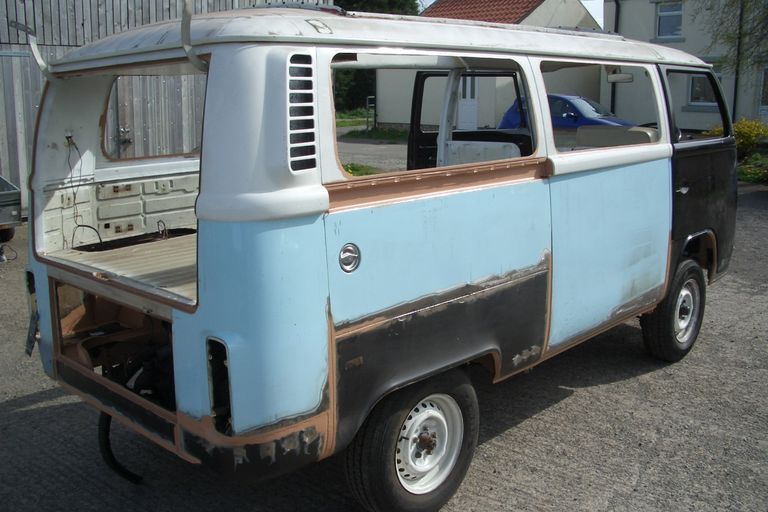
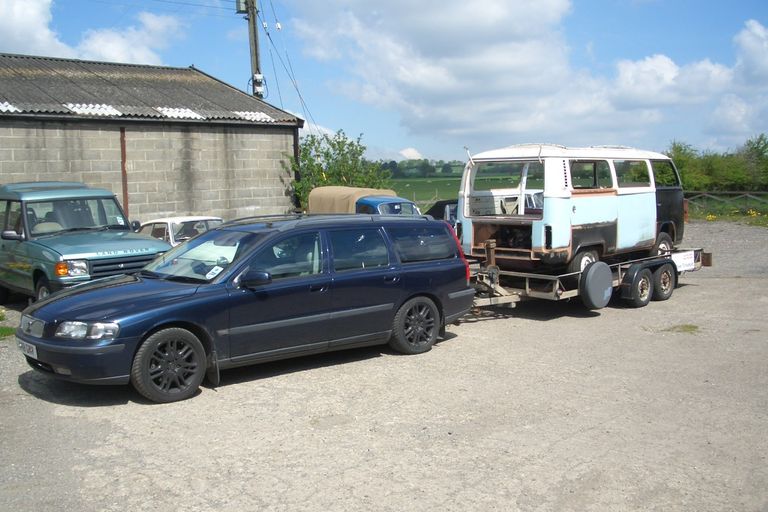
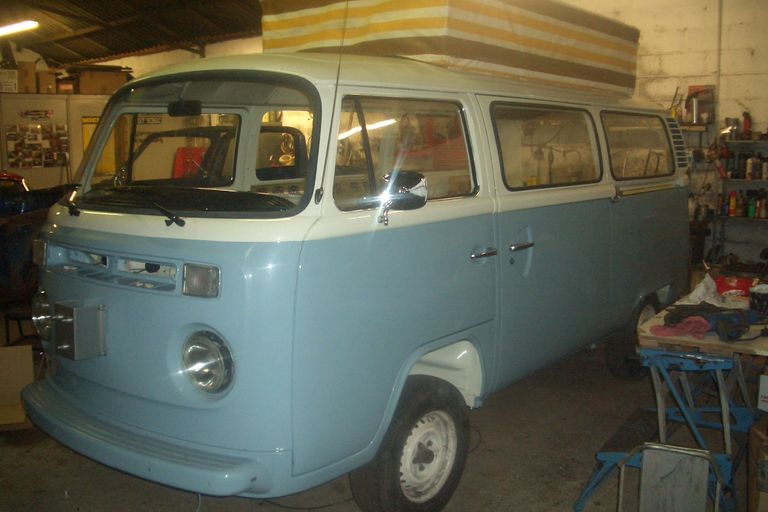
1977 VW Type 2 Devon Camper Restoration
What was I thinking? For all those rose tinted spectacle wearers out there dreaming of long summers spent touring the beautiful, rain free English countryside in the camper van you have just restored - read on. These things set new standards in 'jobs you think you'll never get to the end of' They are big, they rust everywhere and definitely NOT for the faint hearted. Only the brave need continue..
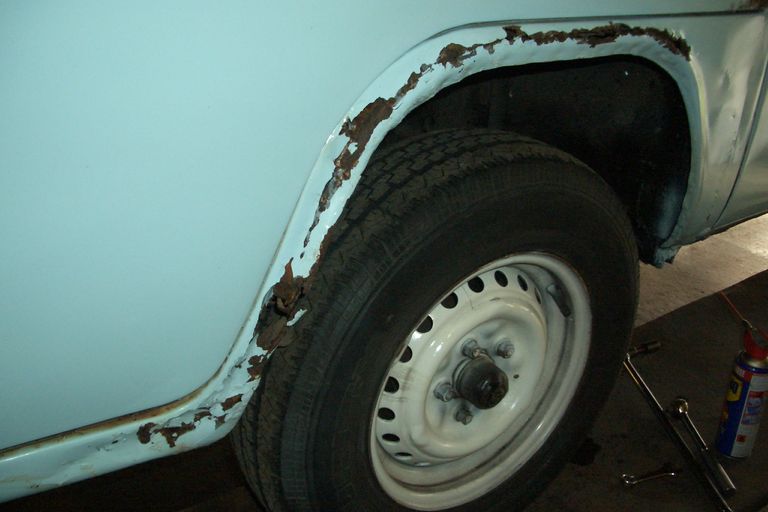
If I recall correctly the initial discussion went something along the lines of 'It'll probably need four new wheelarches' OK then let's see how that works out.
It certainly did need the wheelarches, but at this stage I'm still in denial as to what was to come.
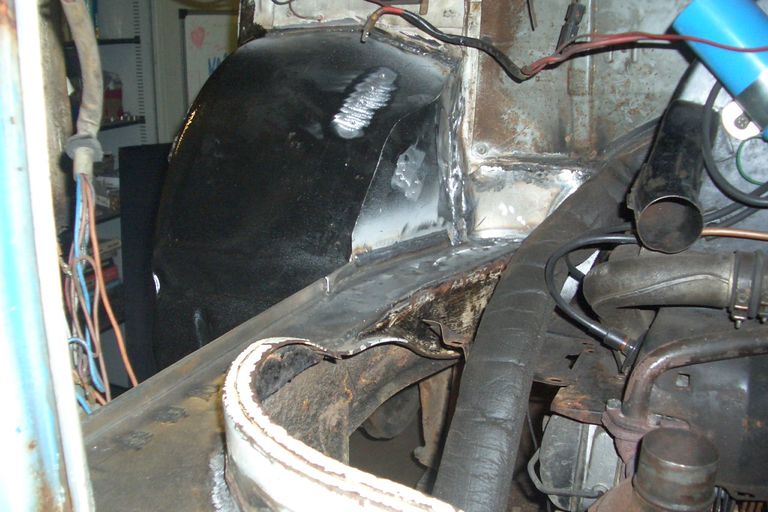
Ugh, here we go again. Where exactly does this stop? This is where the OSF wheelarch meets the front bumper panel.

Just keep cutting until it stops leaving heaps of rust on the floor. Reality hitting home now.
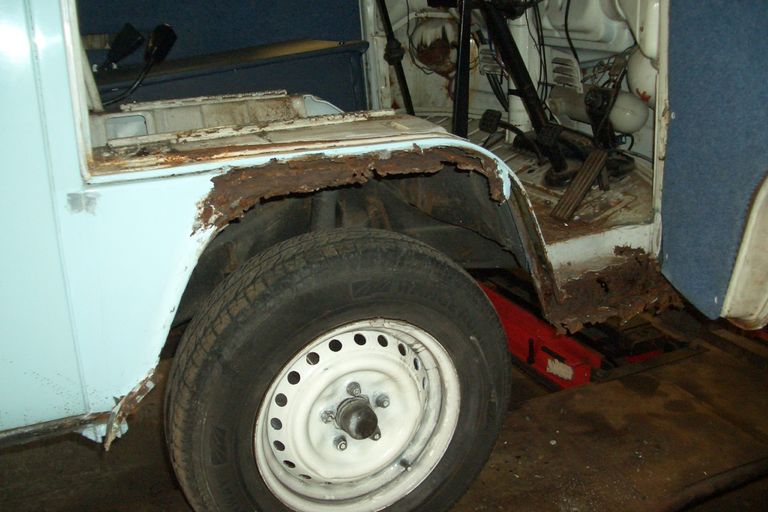
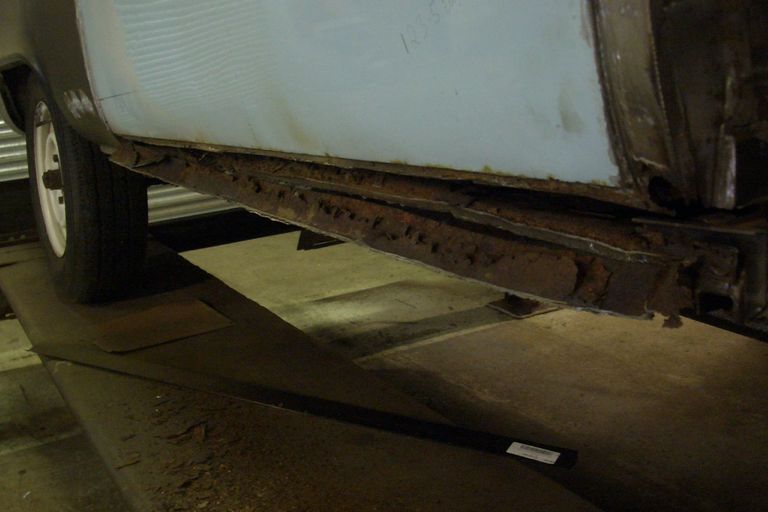
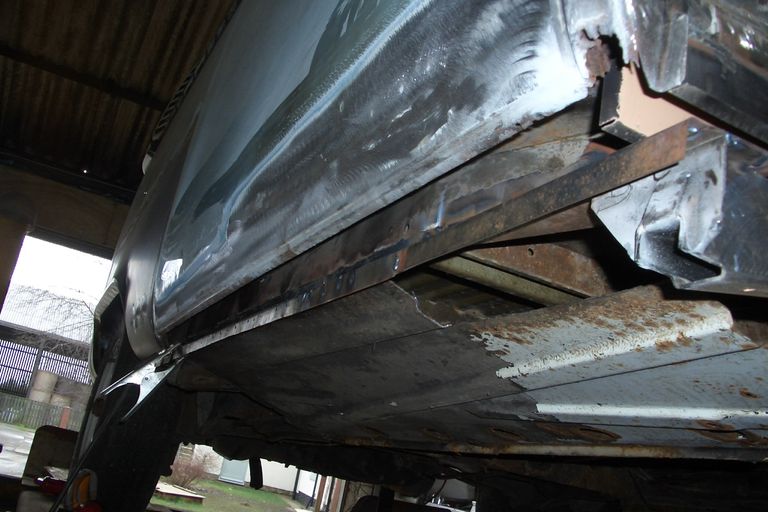
In deep now. All of the wheelarch, inner wing, door step and half the cab floor is gone. We've only just started and the job is already way bigger than expected.
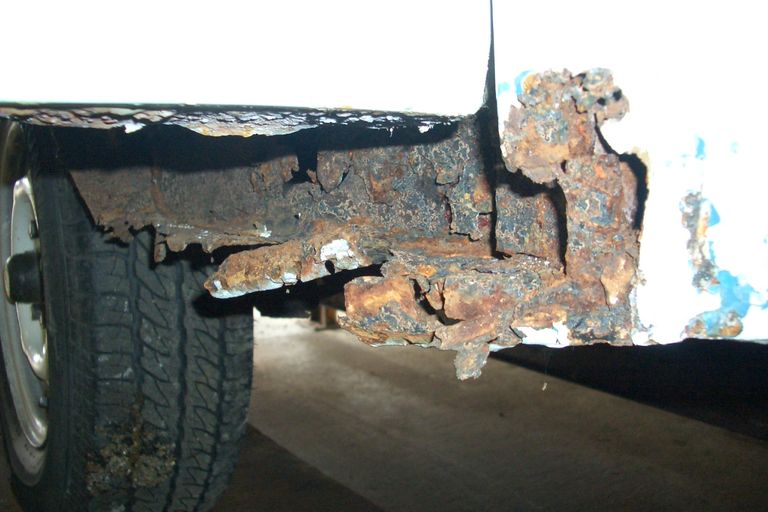
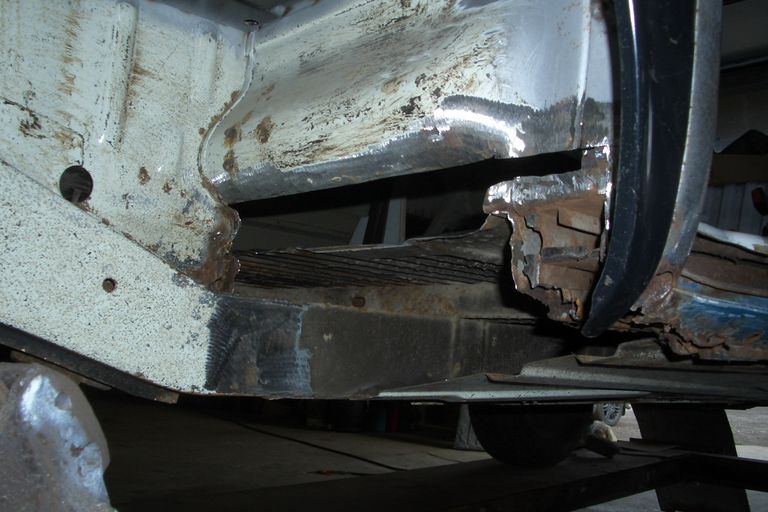
Same on the other side. At least the main chassis rails are sound. I've seen restorations of these where even they were rotten - would you even bother?
So why do they rust so bad? The construction is good, it's German, the metal is thick - it doesn't make sense.
I believe it's the type of owners. I have been asked on several occasions to quote for repaints on VW campers and they are always showing signs of corrosion coming through here there and everywhere. In every case the owner just wants them filled and made pretty again.
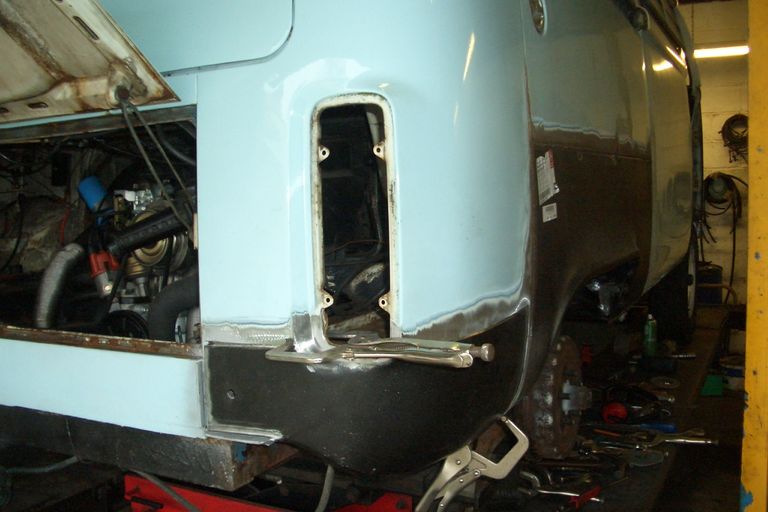
This corner starting to look solid again.
Rust won't get better by itself, and if owners don't commit to the expense of proper repair work the corrosion will eventually be terminal.
Painting them pink and putting flowers on the dashboard won't help!!
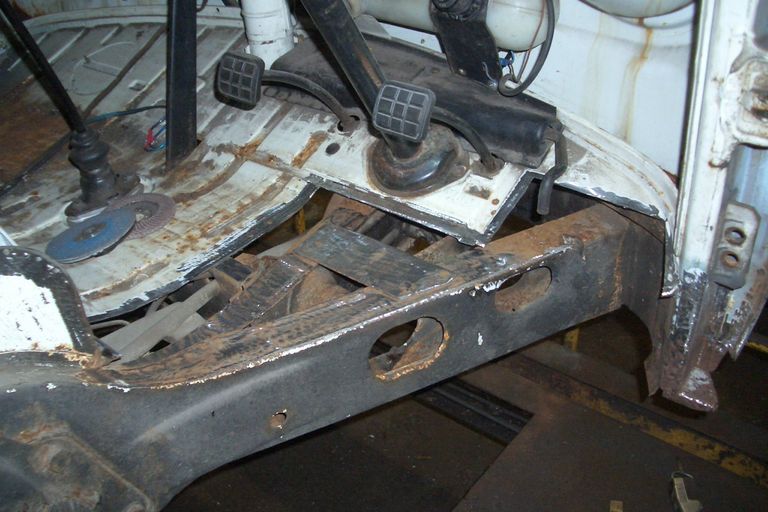
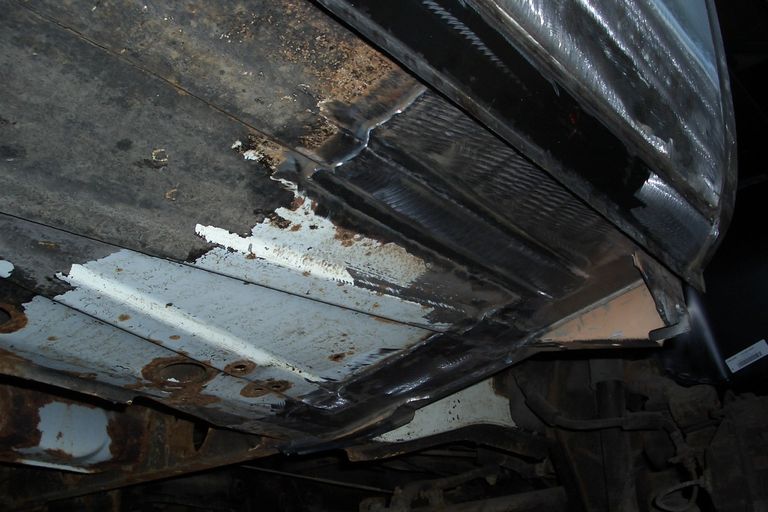
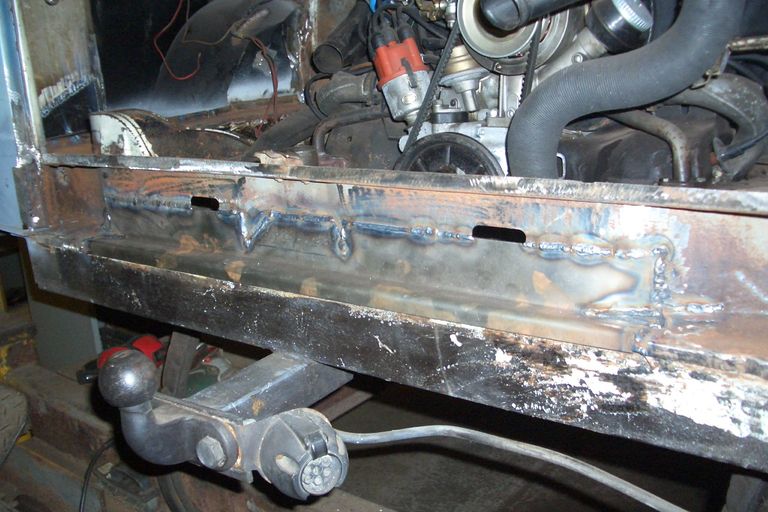
Rotten front outrigger and everything adjacent to it cut away for more fabrication.

Same area all made sound again on the side. But right next to it the tiny outer sill is also rotten.
Peeled away to reveal more awfulness.
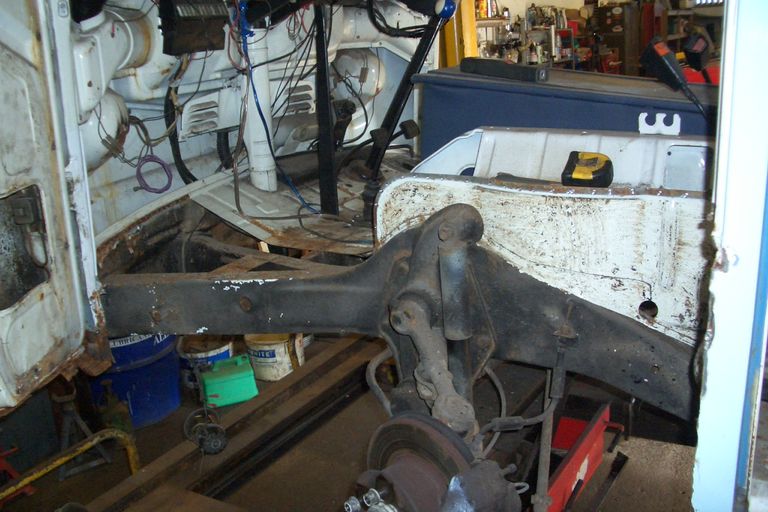
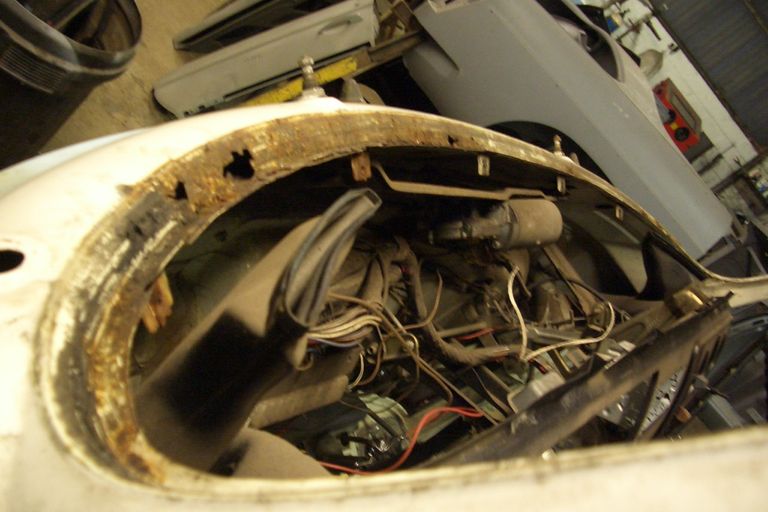
This van had the extra floors beneath the chassis as well as above it. Not sure why, probably for storing drugs in. Whatever, they were rotted through too.
One corner done?

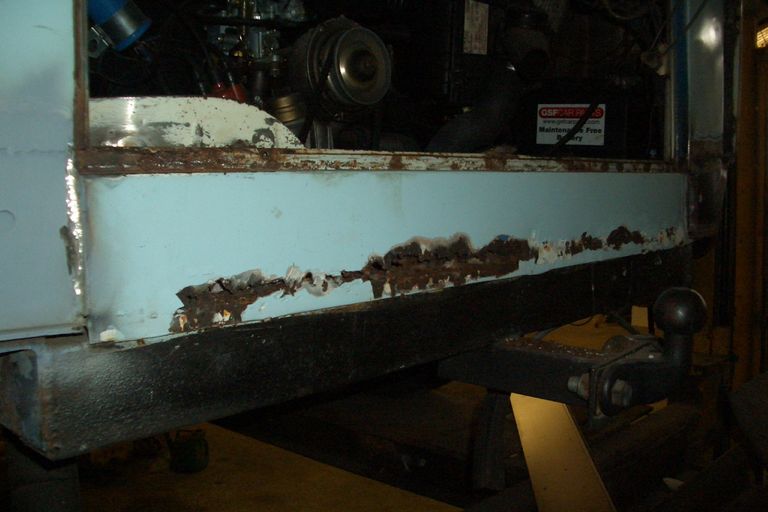
Same side, rear corner. 25 resprays in a lifetime and probably 24 of them covering up the blisters coming through where the inside battery tray meets the outer panel. Can't be ignored forever.
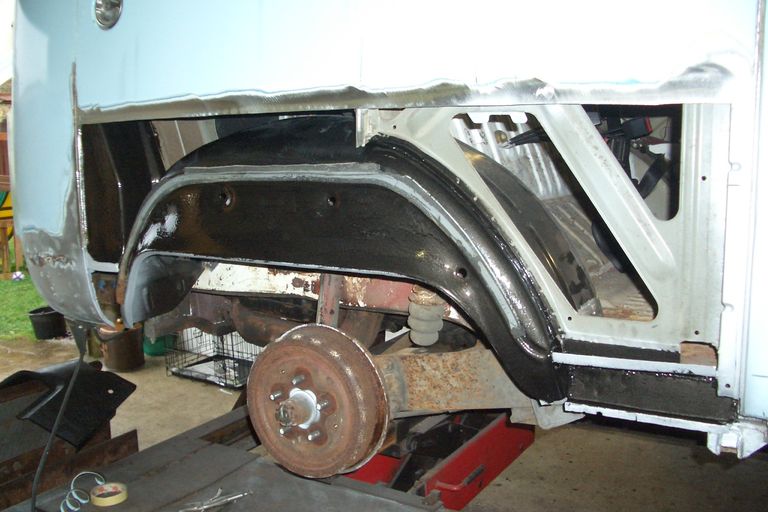
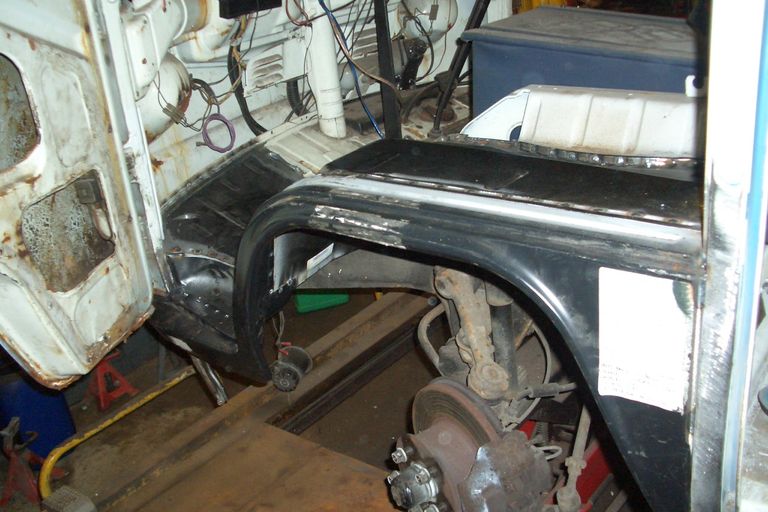
Outer side panel cut away and here I've fitted a complete new inner wing - I recall this being quite simple to do and much easier than repairing the old one. All painted except for the areas to be welded to which get a coat of weld through primer.
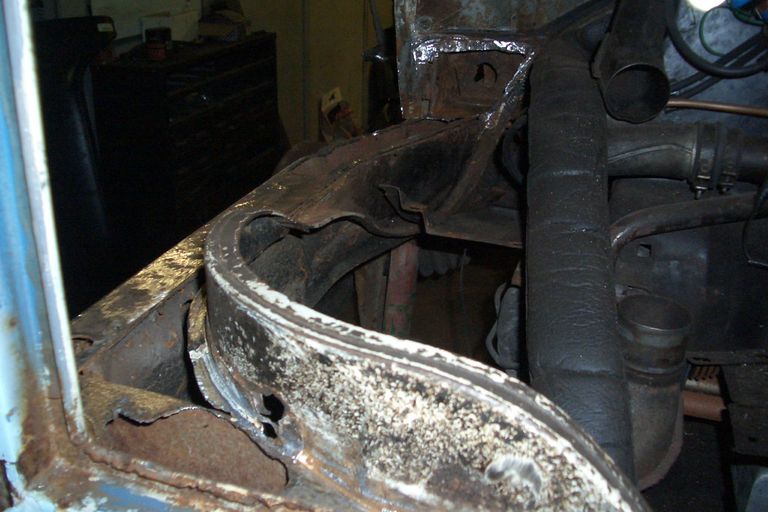
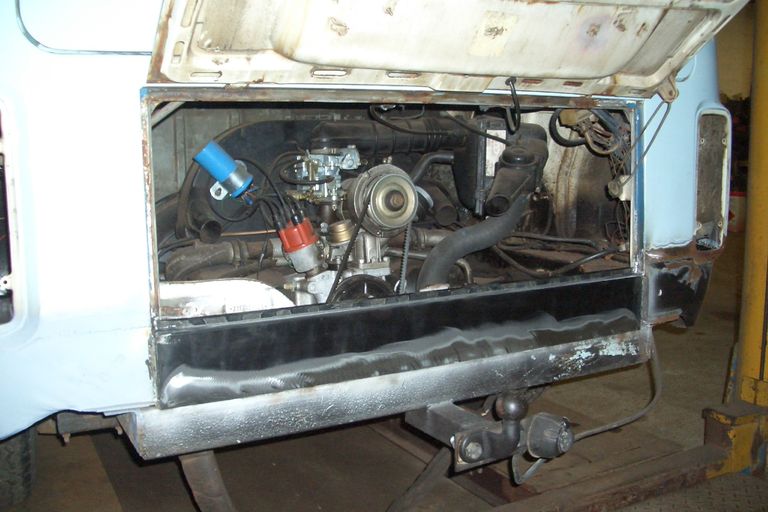
Awkward bit inside the engine compartment - I mean how does this area rust away? It also has the chassis number on it so I didn't want to cut out more than necessary.
All repaired and with a new inner wing fitted too. In case you're wondering why I left one of the simplest engines to remove in place. Well it's big, dumb and heavy and when I'm on my own it means I can stillnmove it.
Fitting the new rear corner - which I recall being a very poorly made panel. The side panel is straightforward. Joddle the long top edge and very slowly weld the two together in spaced apart tacks until they all meet up. I obviously haven't had a look at the rear panel under the engine cover yet.
Now I have. More filler just painted over. It's not as though this is a difficult piece to repair. Even a bad repair would be easy!
The inner panel was a mess too - just how did this have an MOT?
I think the engine cover was OK and probably the only panel to be reused without major work.
Saving the best for last. Of course there was tons of filler along the bottom of the front panel and with the screen out you can see the corrosion in the frame. I think it may have hit a lampost too - so that's that then....
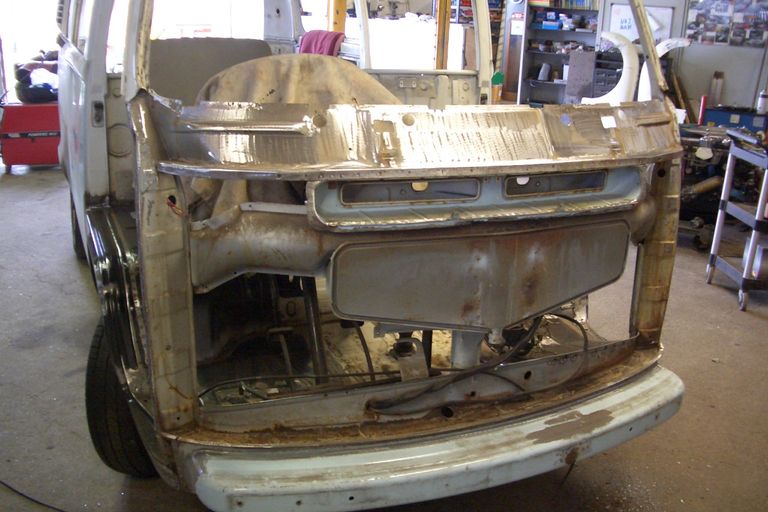
The whole lot cut off and all the corrosion and surface rust being dealt with. I can tell you with certainty that I hated the thing with a passion by now.
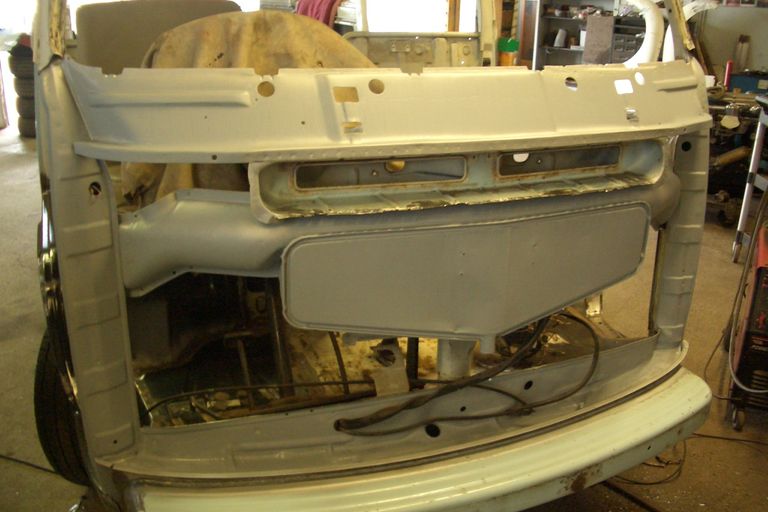
But so what, it has to be done right and the owners are nice people so here it gets some anti rust primer.
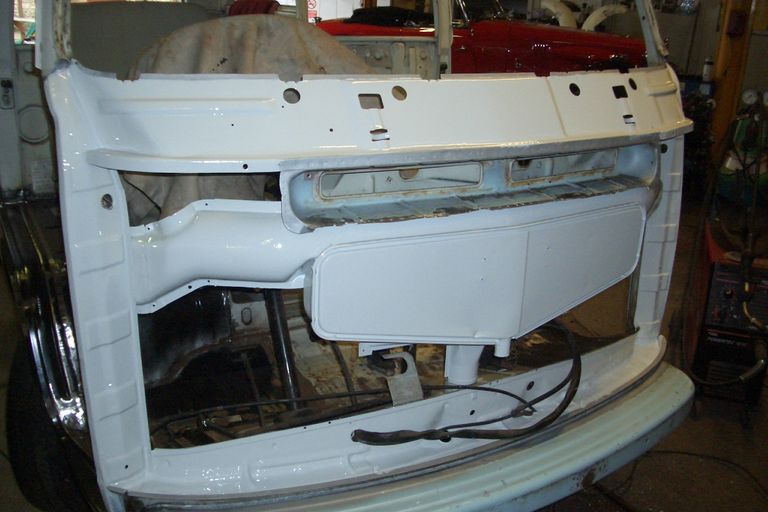
And top coat. For sure more paint protection than it ever had from new. I also had the inside of the new front panel painted in body colour before fitting. It would have been difficult to paint once fitted and there isn't that much welding to do that would damage the paint finish.
Hallelujah it's done! With much more attention to numerous smaller areas of corrosion, gutters, seams, window frames, door runners etc etc
The doors were ruined with rot and filler so new ones were eventually sourced and the tailgate was quite cheap I recall so was replaced rather than repaired.
Taking it away! It was really nice to let someone else have it for a while. Always tow rear engined cars backwards on a trailer - upside down in a ditch isn't a good look!
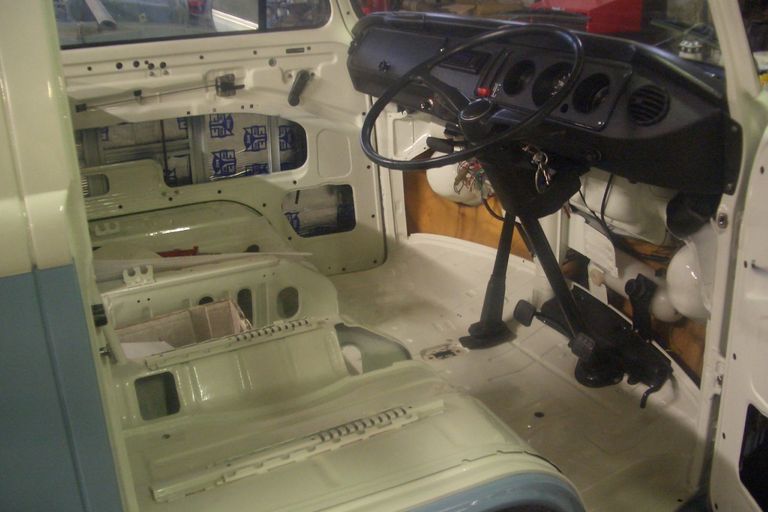
I think we are deep in a cold winter here and also I don't have many pictures so maybe some camera trouble. It's painted and quite a way through reassembly. There was a lot to do and this is surely one of the easier ones! It only has 8 windows and 5 doors.
Looking nice inside. The dashboard was finished in crackle black finish (very 70s) and I used a lot of self adhesive sound proofing matting which makes a huge difference to how solid and quiet it feels on the road.
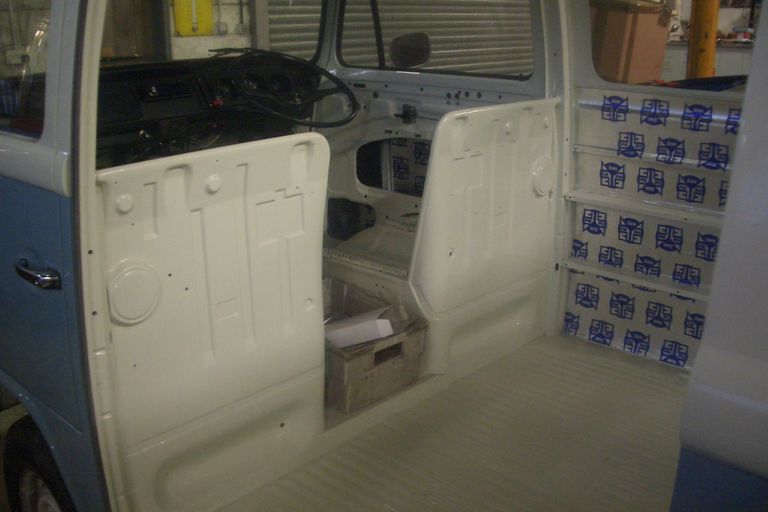
More matting and lots of white space to fill. This was originally a Devon conversion but the decision was made to make it more of a day van with sleeping facilities but not cooking or water.
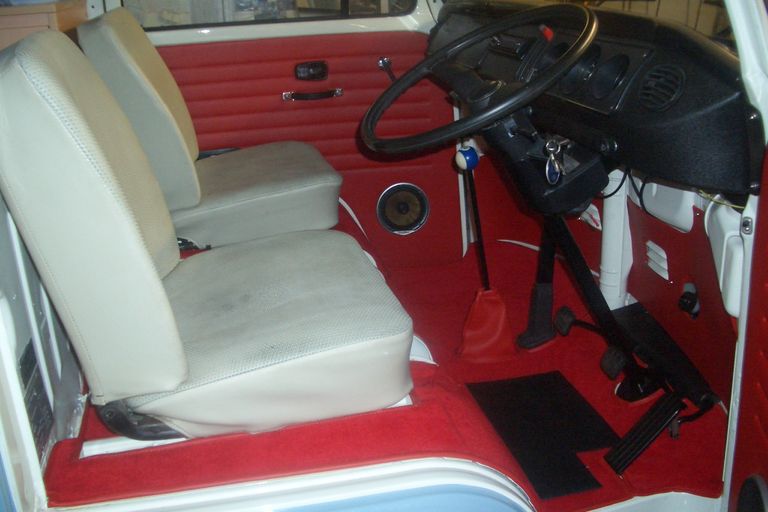
Near the end. I did get a new 'luxury' carpet set from a major supplier but it was awful, not luxury at all and in the end I cut my own set and had a local trimmer bind the edges.
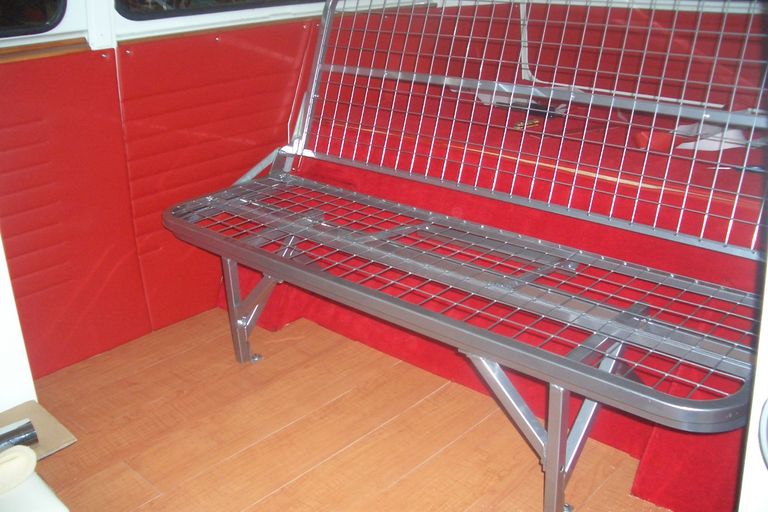
The side panels (from same major supplier) were not very well made so I improved them and made little window sills for them all to bridge the gaps left along the tops. Self adhesive laminate floor wasn't very adhesive! But the rock and roll full width bed was really good quality and worth the extra expense.
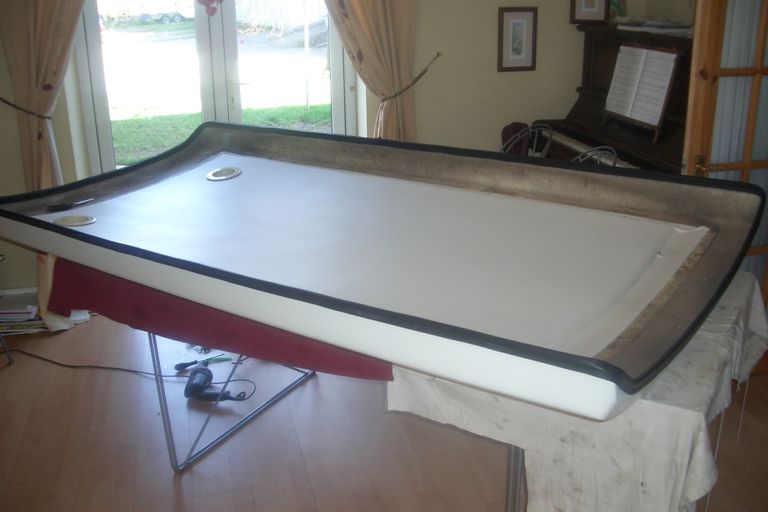
I wanted the pop top roof to have a nice padded headlining so it came in the house to get 1" foam pad and some lined VW perforated headlining cloth fitted. It looked lovely until the warm weather cam and the adhesive let go!! This is a common problem with aerosol adhesives and very annoying. It was done again the following year using an excellent adhesive (3M 90) that really doesn't let go.
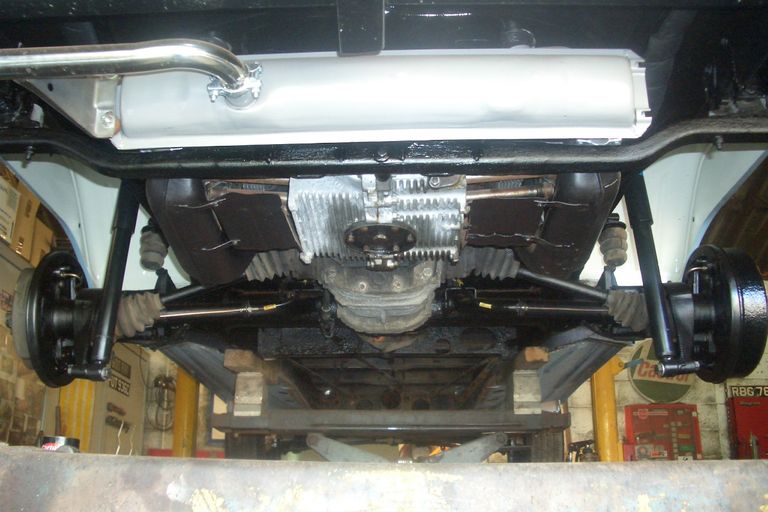
Everything underneath that needed to be done was done, but it wasn't fully restored. Brakes, dampers, gaiters heater tubes, all the important stuff and of course servicing, tune up exhaust etc etc.
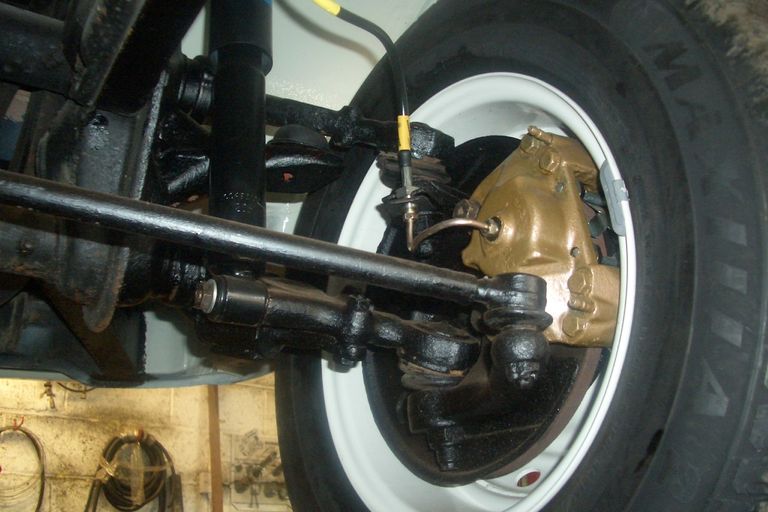
Black waxoyl on the remaining ugly bits, it still looks really smart but can be used without worrying about the underside too much. All that sound proofing really helps, it's very quiet inside (for a VW camper) it just needs an extra 50hp!
Black waxoyl on the remaining ugly bits, it still looks really smart but can be used without worrying about the underside too much. All that sound proofing really helps, it's very quiet inside (for a VW camper) it just needs an extra 50hp!
© Copyright 2020 Willow Triumph Ltd. All rights reserved.