- Home
- Contact
- Restoration Gallery
- Services
- How to find us
- Triumph TR4A Restoration
- Triumph TR4 Restoration
- Triumph TR4 Restoration
- Triumph Herald V8
- Triumph Spitfire 1500 Restoration
- Triumph Spitfire MK4 Restoration
- Triumph Spitfire 3.5 V8 conversion
- Triumph Vitesse 2ltr Convertible Restoration
- Triumph Spitfire Mk3 Restoration
- Triumph Vitesse 2ltr Mk2 Body Restoration
- Triumph TR6 Restoration
- Jaguar E Type body restoration
- Triumph Stag Restoration
- Triumph Stag Restoration
- Morris Minor Van Restoration
- VW Type 2 Camper Restoration
1971 Triumph Stag restoration and conversion to Rover V8 + 5spd gearbox.
I see a lot more Stags in the workshop these days, in fact probably more than any other model, so I thought it was about time I put a good
Stagmare on the website! This one turned out to be a very nice car but it was a long haul and, as is so often the case, all was not as it first appeared. Read on....
This car arrived looking reasonably tidy but minus engine, gearbox, radiator and propshaft. The story being that a relative of the current owner spent a lot of money having the body restored and the engine rebuilt, only for the engine to expire! So it was removed and thrown away (kind of) and the car put to one side. And there it stayed until it was taken on by the new owner many years later in the knowledge that at least the body would be good....hmm.
So the strip down began and here was one of the first clues that all was not as it first appeared.
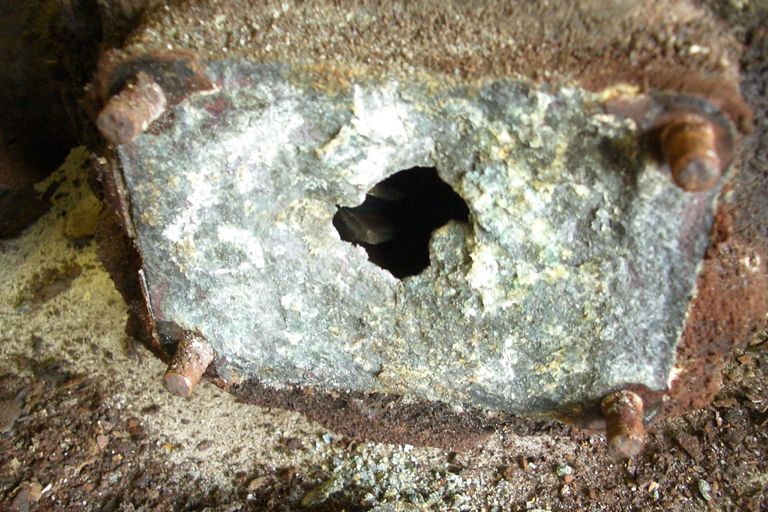
What you see here is the differential mounting crossmember and a socking great corroded hole
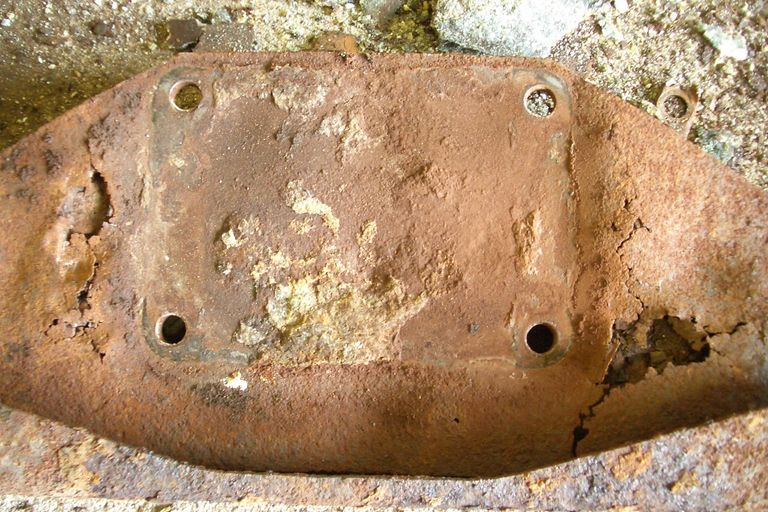
through the back of the diff! I spotted this whilst in the boot changing the boot floor...
...which ended up being all the lower edges, and the rear valance and the side valances, or lower rear wings if you prefer.
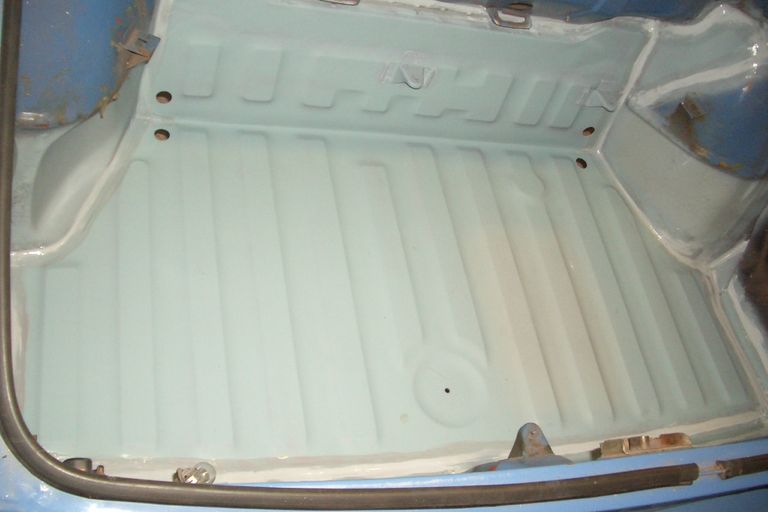
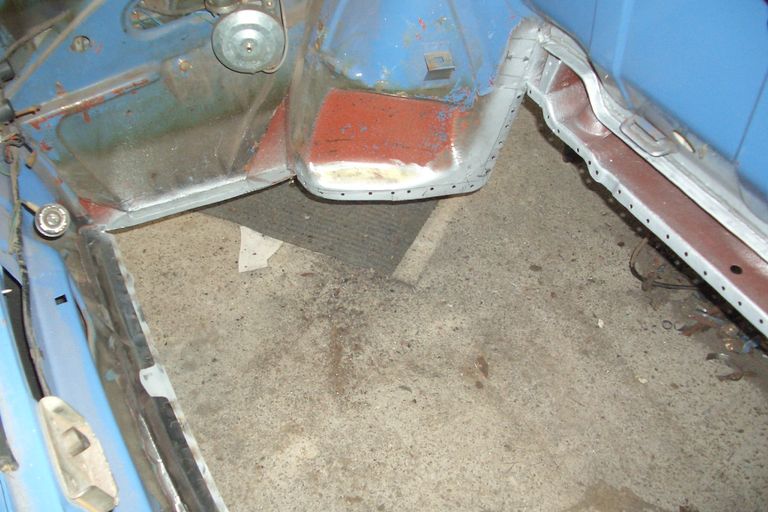
Quite pleased with myself here and still thinking it was a quick project I moved onto the engine compartment for some minor repairs there.
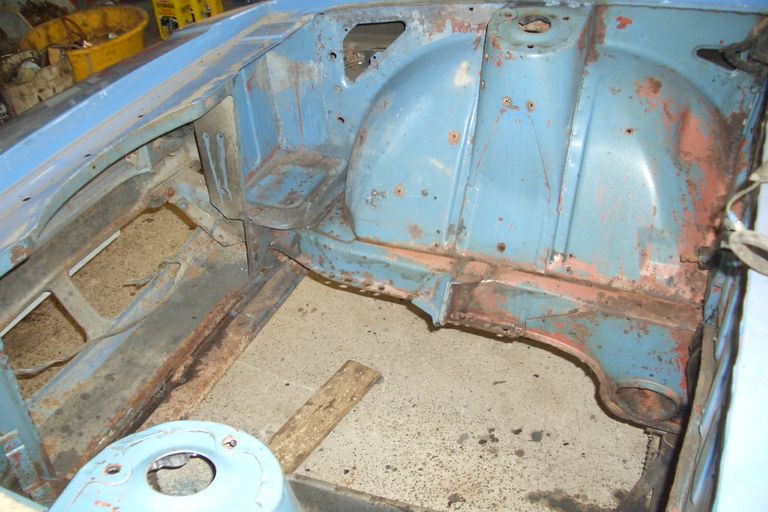
And here it is all cleaned up. The body was quite nicely painted and the hope was not to require a full respray so just the engine bay and boot would get painted.
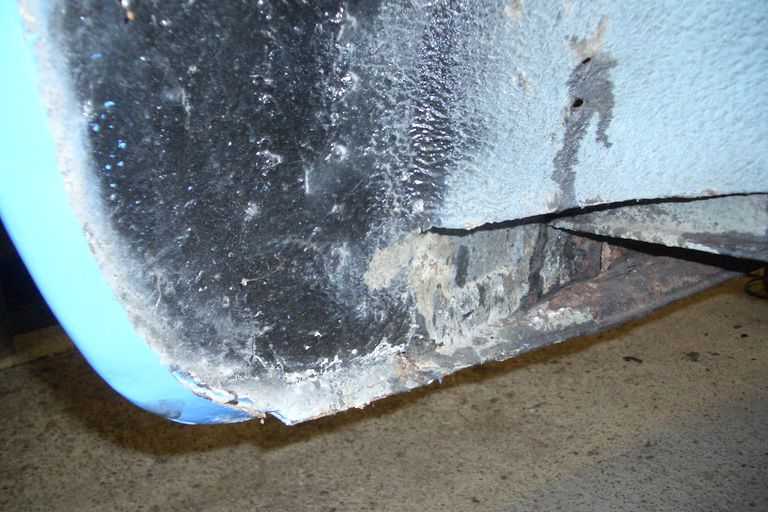
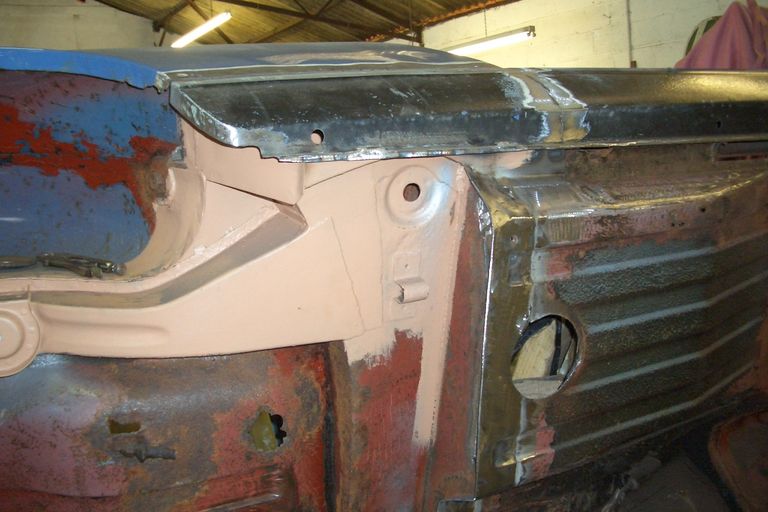
This picture is of the LH front inner wheelarch at the front where it meets the radiator support panel. The support panel needed replacing so I had to remove the underseal around here first - looks OK though doesn't it?..
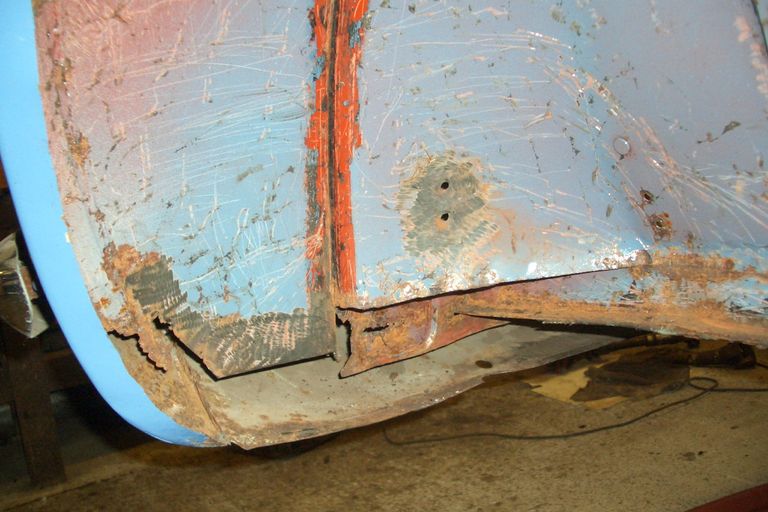
Well not after the underseal and filler was dug out. The previous 'restoration' was a classic 'paintshop restoration'. All the outside had been done with no consideration for what lay underneath. The pictures above show how the new front wings were welded on top of rotten inners with no welds at all to hold the two together.
I would later discover that the sills were the same and held on with a couple of braze tacks at each end. How much body strength had been lost by bodging in this way? For certain this was no longer a quick job and a full repaint was going to be required.
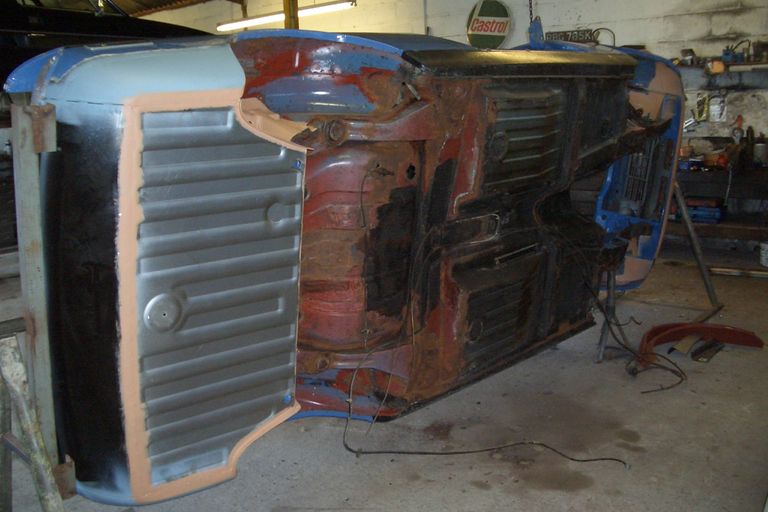
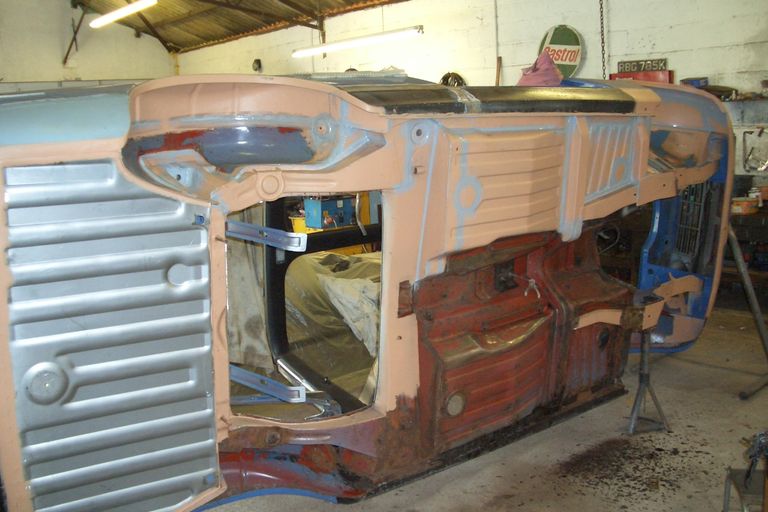
Here we go again, on its side for the truth to be revealed. Putting a car on a spit like this makes a truly horrible job at least bearable. I'm not going to kid you that I enjoy plugging my way through rotten undersides - I don't, but it has to be done before you can get to the good bits.
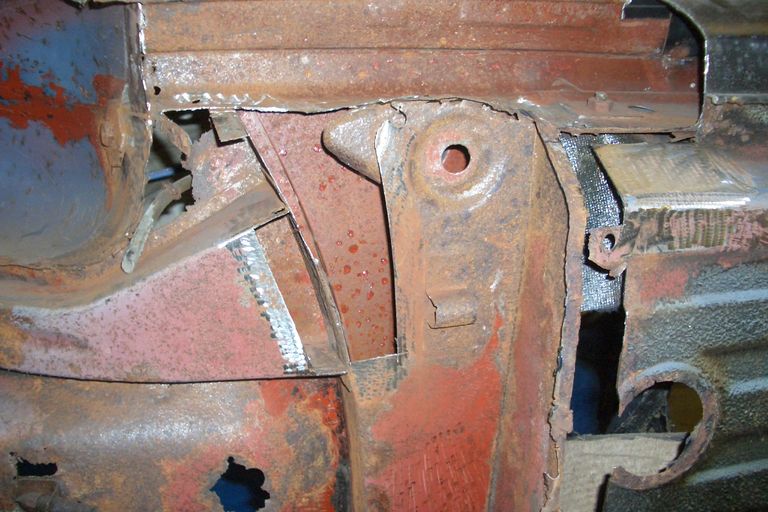
And here is one very typical example of the extent of rust I would be dealing with for the coming months. This is the RH rear subframe mounting area with the sill cut away for access. All the awful bodged repairs and rot has been cut away before at least a dozen separate repair sections were made up to put it all right.
And here is the same area all done. I tackled this whole underside in small areas at a time to keep spirits up! That way I could feel happy with small amounts of good progress and try to ignore just how much was still to come!! It's good advice if you are doing a restoration at home - don't chop out all the grot in one go - you'll be overfaced and then depressed!
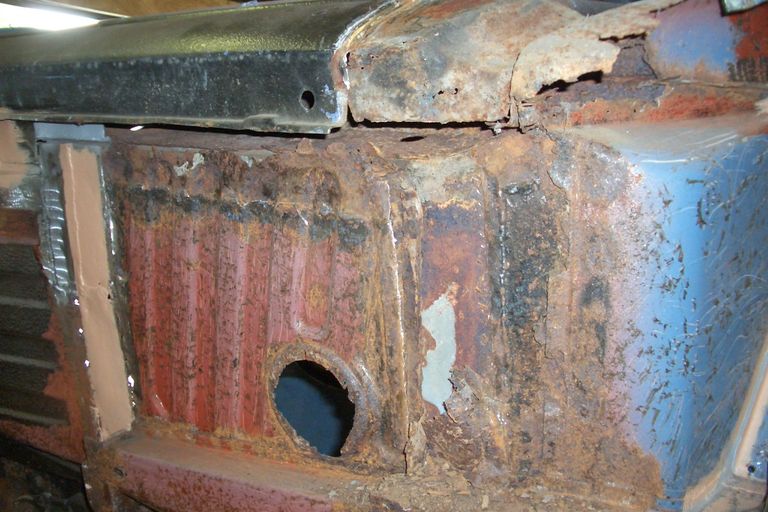
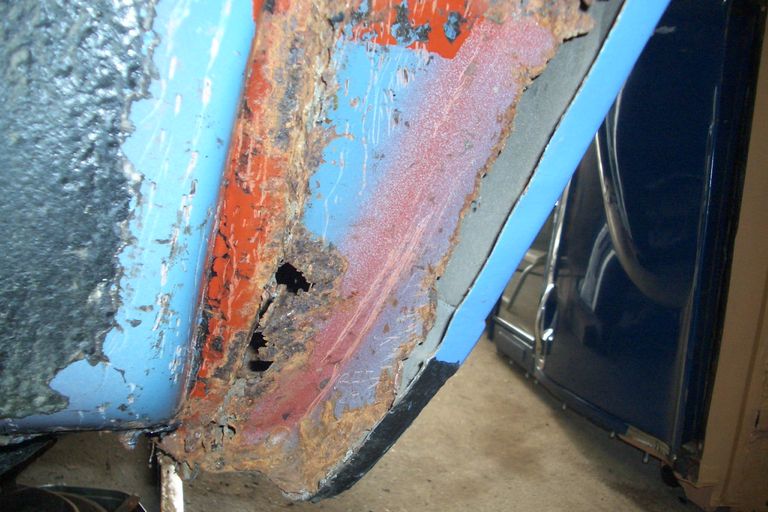
And then the same side at the front showing what a mess the floor, front and centre crossmembers and sill end were in. The sills (as with most cars) should extend behind the front wings but as usual these had just been cut off and sealer used to hide the joint. So the bottom of the wings came off to reconstruct the area properly.
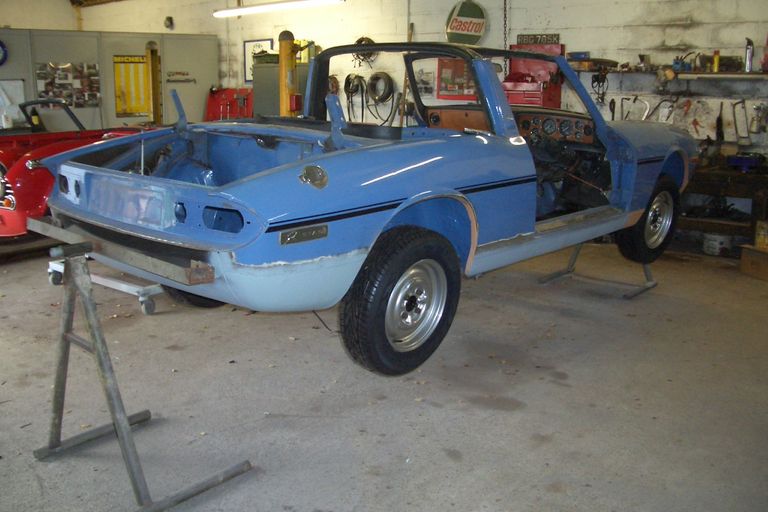
Much, much later and doesn't this look better. A real mammoth task with so much bodged over rot but the end result is a nice clean, painted underside with no hidden nasties.

You'll notice that there is no rear seat pan and that was the sticky panel for this build - there's always one! We got one eventually and moved on to making it look pretty.
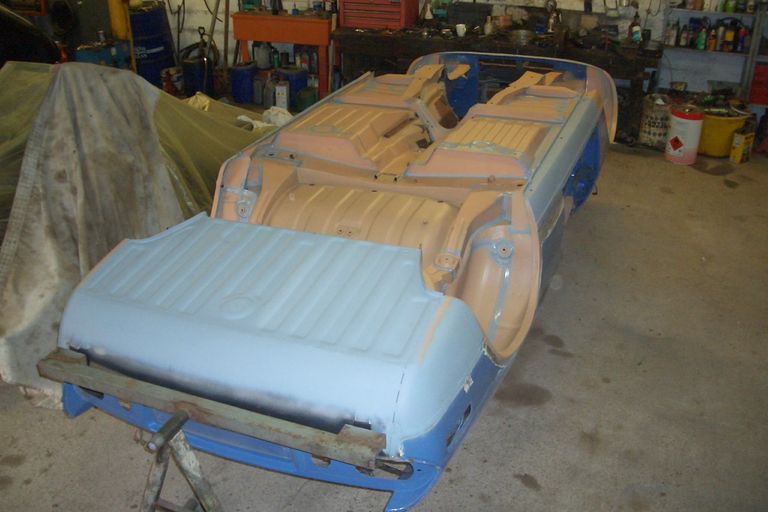
Yep, completely upside down - how cool is that?
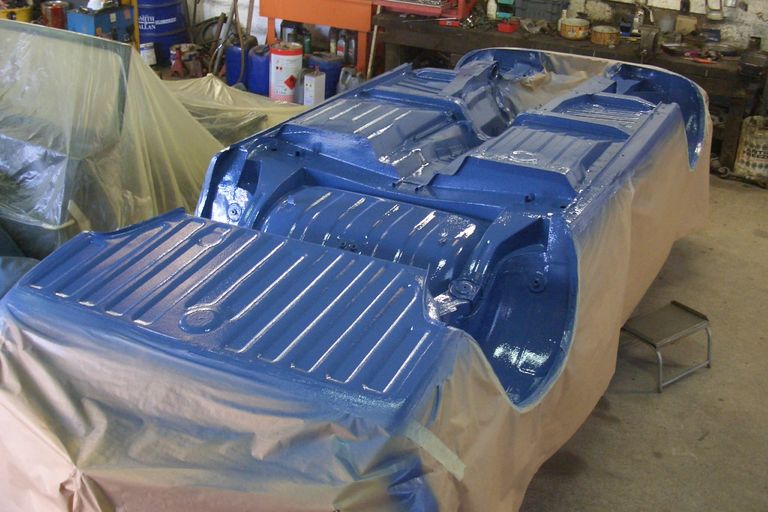
Two coats of stonechip, all the joints and seams sealed then two coats of French Blue and all of a sudden there's a real nice looking car emerging.
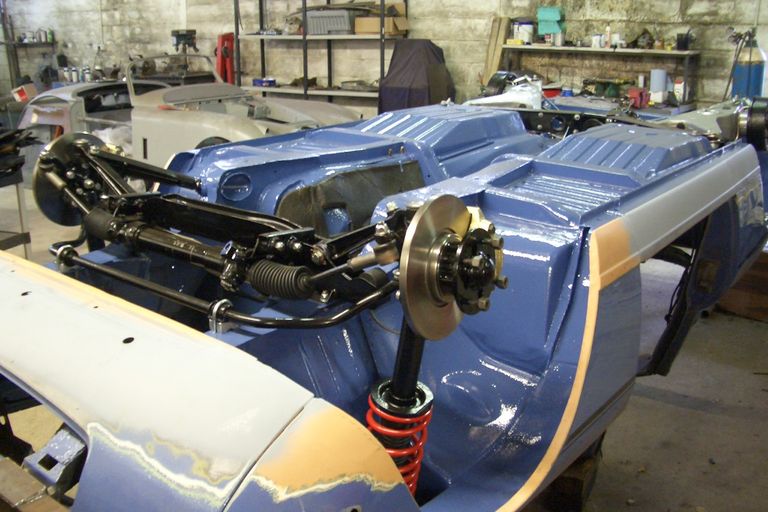
Fitting all the suspension and rear axle on an upside down car was a revelation - it was so easy! Really enjoyable work with all the sub assemblies having been done in between all the welding.
And seen here up the right way again but 2ft up in the air - now how do I get it down on the ground again?
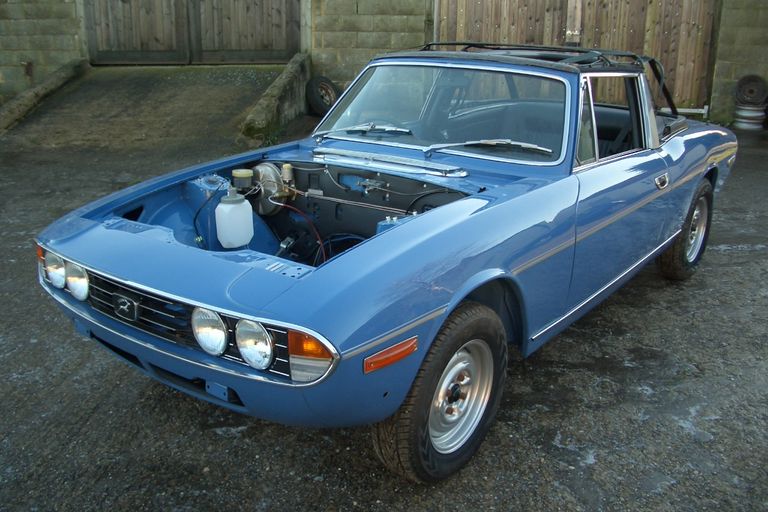
Let's skip forward a bit. I did get it down on the ground again, and then spent another chunk of time dealing with more normal bodywork issues and getting it ready for a repaint. Here it is looking sharp and all trimmed up on a cold winter day, the engine bay is all fitted up, interior is in, hood frame repaired and fitted. Just waiting for the bumpers and seats from the owner who took them away and saved me some work by refurbishing them at home.
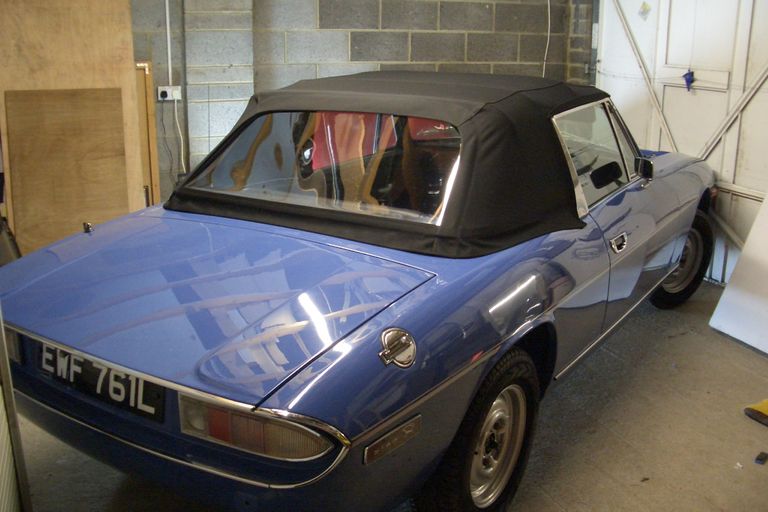
As the bumpers were off I could just get it into my little side garage to fit the hood. It was just too cold in the workshop and no way to raise the temperature enough to stretch the hood. A couple of heaters in the little garage and it was toasty.
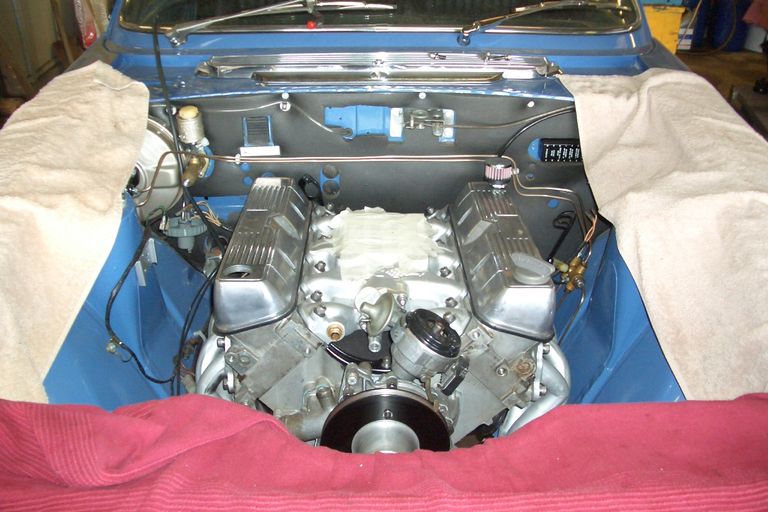
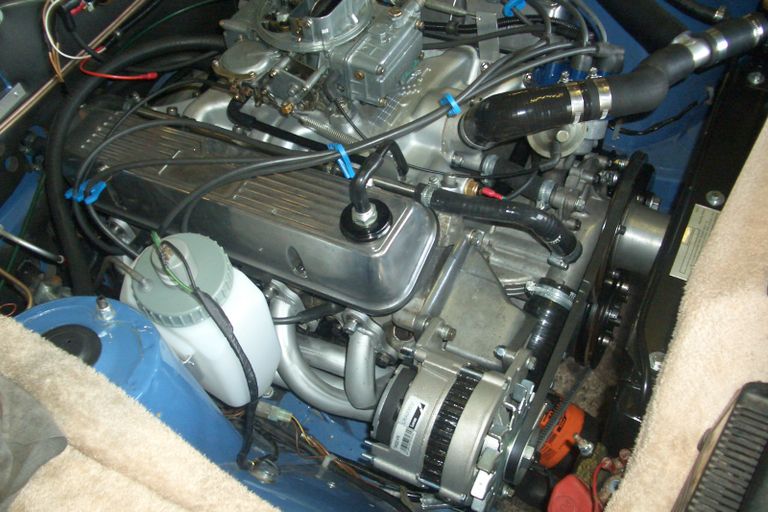
But what about the engine? Well the owner was building that and when it arrived looking all nice and shiny it was my job to get it in and working right. Apparently they used to throw Rover V8s into Stags in a weekend 'back in the day' but as with all that type of story it's never so easy. Anyway here it is, a Rover 3.5ltr after the first hurdles were cleared and it's actually bolted in with LT77 5 speed gearbox on the back. There were plenty more obstacles to come to get it looking and
functioning right.
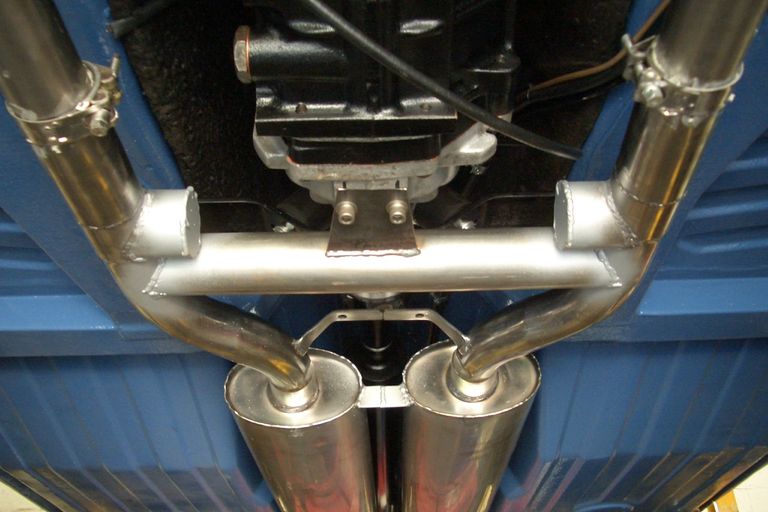
Here's the very nice large bore stainless exhaust which the owner supplied. Unfortunately as it was built for a Triumph engined Stag the balance pipe was in exactly the wrong place. So I repositioned it further back to clear the gearbox. I left the old stubs in place and capped them because Matt says he'd like to put a Triumph V8 back in one day!
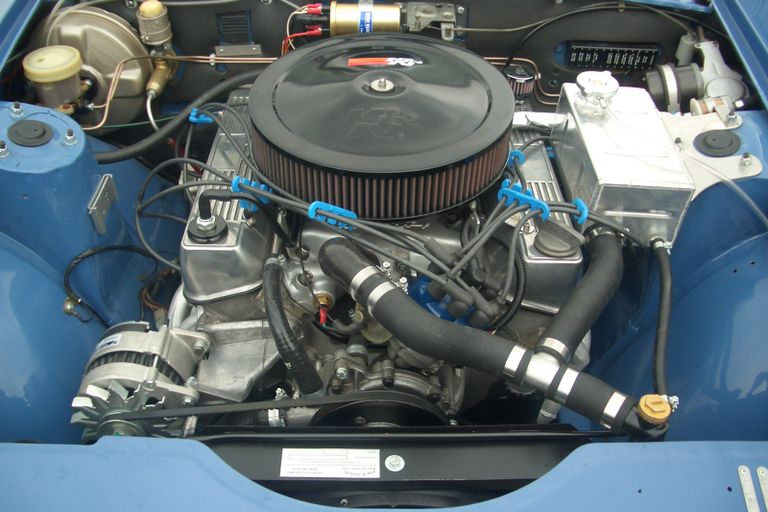
And here it is finished. Note the large purpose made header tank which keeps a head of coolant above the height of the engine at all times. We managed to get everything under the standard bonnet with no major problems. I think the biggest headache was mounting the power steering pump and alternator in a manner that didn't just involve a selection of bits of angle iron.
There's also a trusty Holley 390 carb with K&N filter and a Revotec electric fan with their lovely electronic in line thermostatic controller. It's all pretty standard stuff but it looks right at home and has a lot more punch than a Triumph V8. It has to be said it doesn't sound so tuneful as the Triumph engine, but I'd happily trade that for the simplicity and extra power.
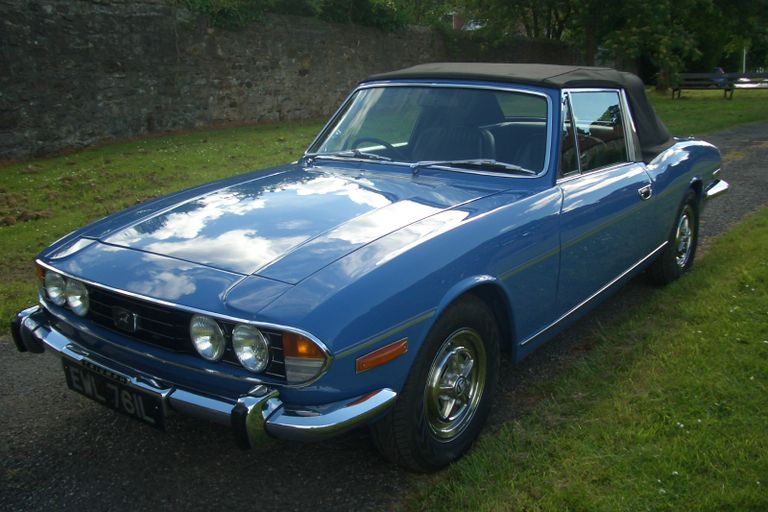
Gorgeous! A great looking car and still on the original style steel
wheels with Rostyle wheel trims. It's slightly lower, slightly stiffer, a
bit faster and much much cleaner than your average Stag.

When they are right Stags can be super to drive, most are a bit soggy and not that exciting but this one is just how one can be - sharp, stylish, fast. Top down, family in, sunny day off to a car show, burble, burble - perfect!
© Copyright 2020 Willow Triumph Ltd. All rights reserved.