- Home
- Contact
- Restoration Gallery
- Services
- How to find us
- Triumph TR4A Restoration
- Triumph TR4 Restoration
- Triumph TR4 Restoration
- Triumph Herald V8
- Triumph Spitfire 1500 Restoration
- Triumph Spitfire MK4 Restoration
- Triumph Spitfire 3.5 V8 conversion
- Triumph Vitesse 2ltr Convertible Restoration
- Triumph Spitfire Mk3 Restoration
- Triumph Vitesse 2ltr Mk2 Body Restoration
- Triumph TR6 Restoration
- Jaguar E Type body restoration
- Triumph Stag Restoration
- Triumph Stag Restoration
- Morris Minor Van Restoration
- VW Type 2 Camper Restoration
1957 Morris Minor Van restoration / resurrection!
I have a bit of a soft spot for Morris Minors. My first proper car, and much of my childhood spent being ferried around in the back of a Moggy Van. This van was to be the next major restoration, or as the title suggests resurrection from certain demise. Sold to the owner as requiring "a weekend of welding" Hahahahaha.........
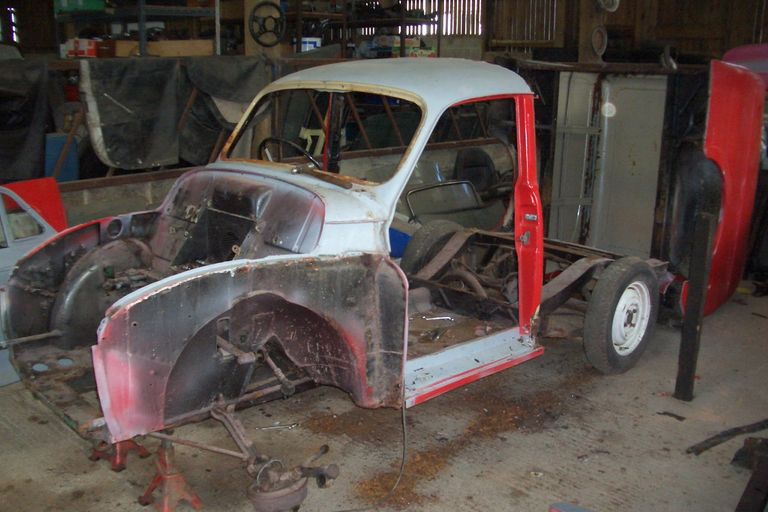
Really simple cars that you can usually strip down quickly and easily. This one was in a terrible state with everything rusted solid and welded together where it shouldn't be. This is going to be a challenge.
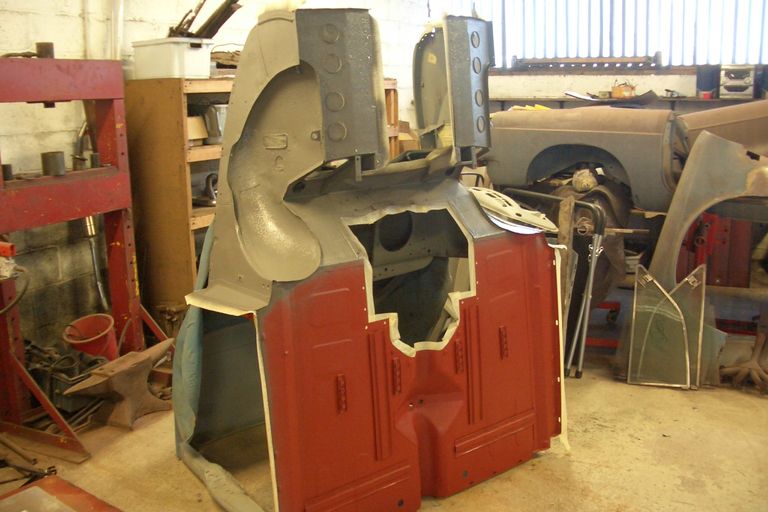
At this stage you are looking for signs of the cars history. What has been done? What hasn't? Accidents, previous repairs, rust. Often you get right to the last option - "Is there anything left to save?" It was really bad with so many previous attempts to repair that little was left to work with. Of the painted panels propped up at the side only the grille panel was in reasonable condition.

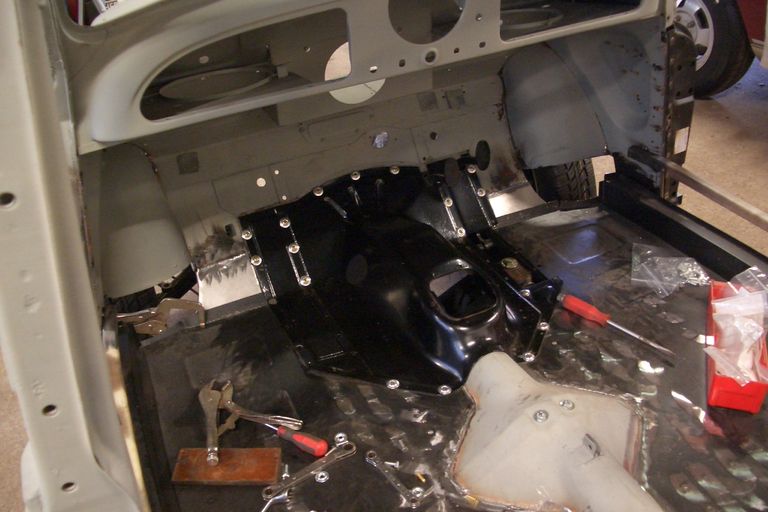
In this picture only the kick plate,outer sill finisher and the hump in the middle of the floor were re used. Even the gearbox cover was welded to the floor.
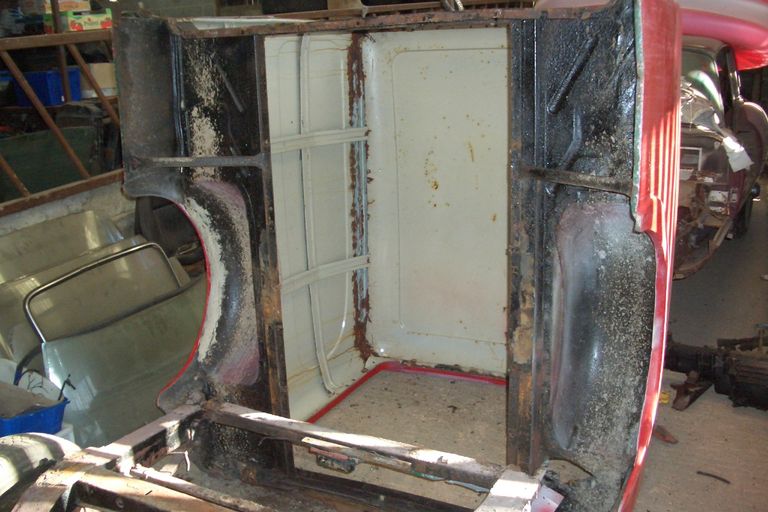
The van body is known for horrible corrosion in the roof gutters and everywhere around the lower edges. This had all of that, which wouldn't have been so bad if it wasn't for the awful attempts to repair the gutters, which effectively made the whole lot unuseable. What now?
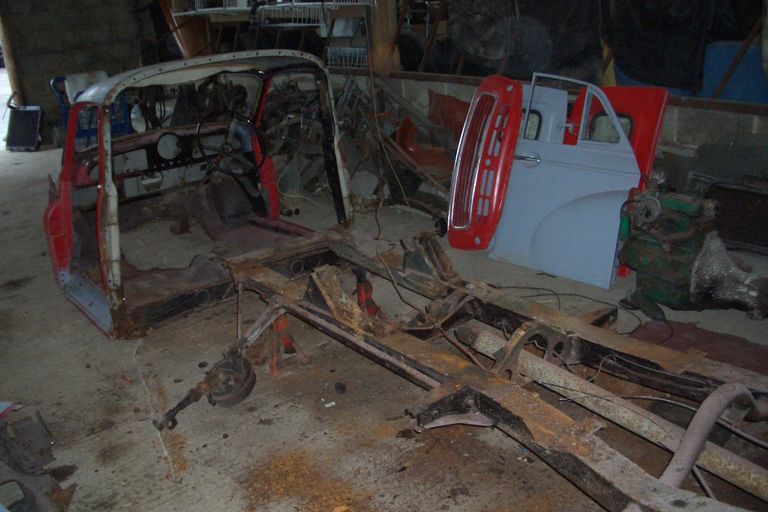
Here is the remnants of the cab after media blasting. I retained as much as possible to try and keep some rigidity. I could quite easily have ended up with just a bulkhead panel as everything else needed extensive repairs. I think there was 3 weeks worth of welding repairs just in the front end. Full floor and sill assembly, tie plates, flitch panels, door pillars, gutters and repairs to numerous other areas of corrosion and bodges.
etting the floors and sills in place using a new gearbox cover as a valuable template for positioning. Slowly making progress. It has to be said that some panles could be better made. The door hinge pillars for example didn't allow for door adjustment because the hinge attachment recesses were incorrectly positioned. Surely it's as easy to make them the right dimension as it is to make them wrong?
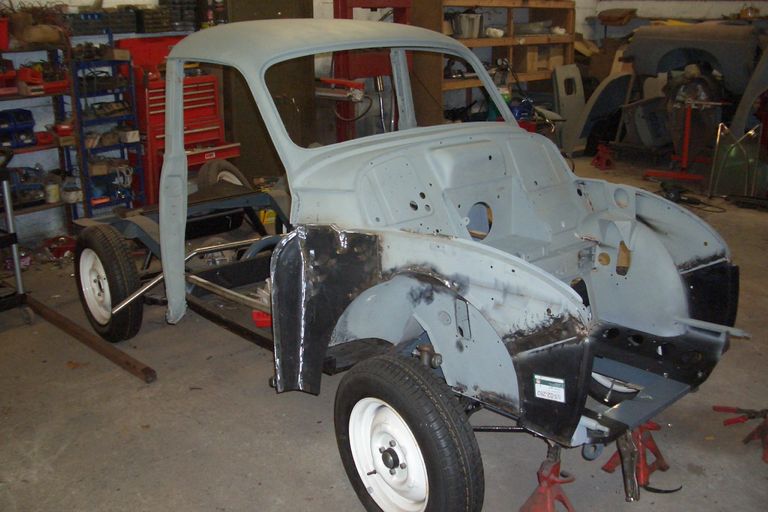
I'm not sure why but I don't have any pictures of the restoration of the chassis, suspension and engine etc. The original chassis was in a terrible state and so rusty it just couldn't be saved. The metal was paper thin all over and the decision was made early on to replace it. A fantastically good quality (English made) chassis was purchased which is not only better than those made in Sri Lanka, it's better than the originals. I had it powder coated a mid grey for some contrast.
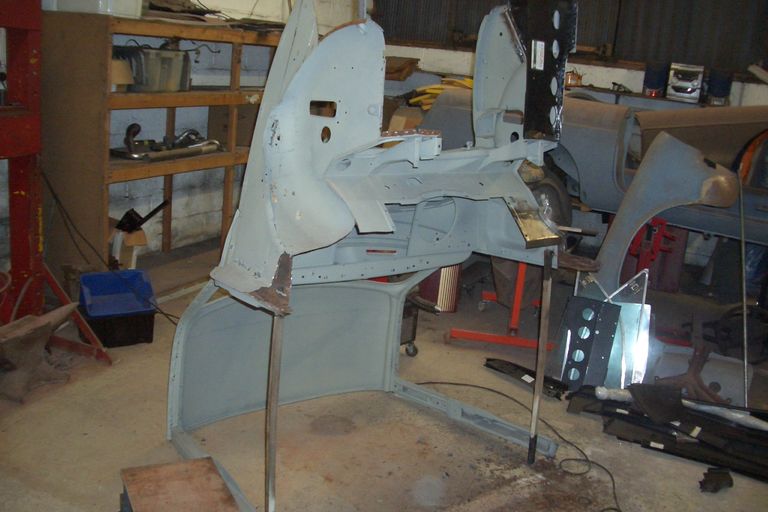
Engine, gearbox, rear axle, suspension - everything had major problems and was fully rebuilt. The cab is taking shape here. Doors were replacements. Bonnet, front panel and wings are those that came with the van all repaired as required. At this stage I'm not even thinking about the van bit.
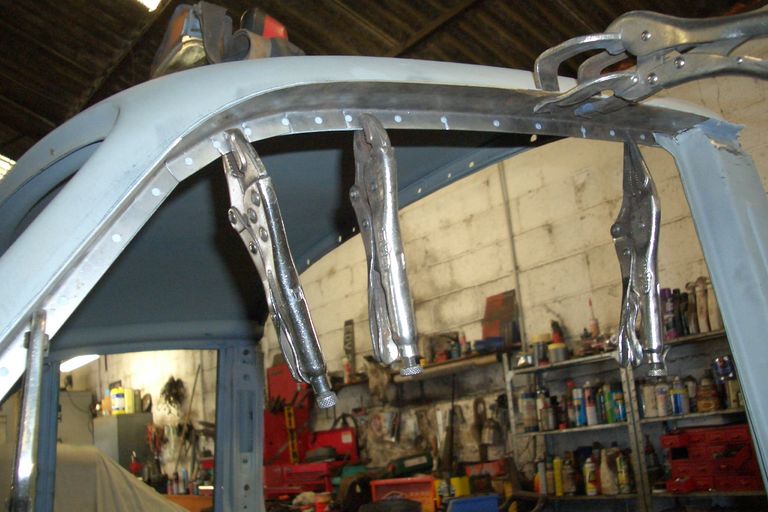
Repairing the gutters. There was nothing much left of the roof edge so this all had to be remade before the new gutter could be attached. Fiddly delicate area to repair but it all worked out good.
Getting ready for the paintshop. I prefer to do this bit myself. paint with anti rust primer, a couple of coats of stoneguard then all the joints and repairs seam sealed. Honestly if you spend time here it will not only look good but it will hold the rust off for many years. The cab section was at least easy to move around.
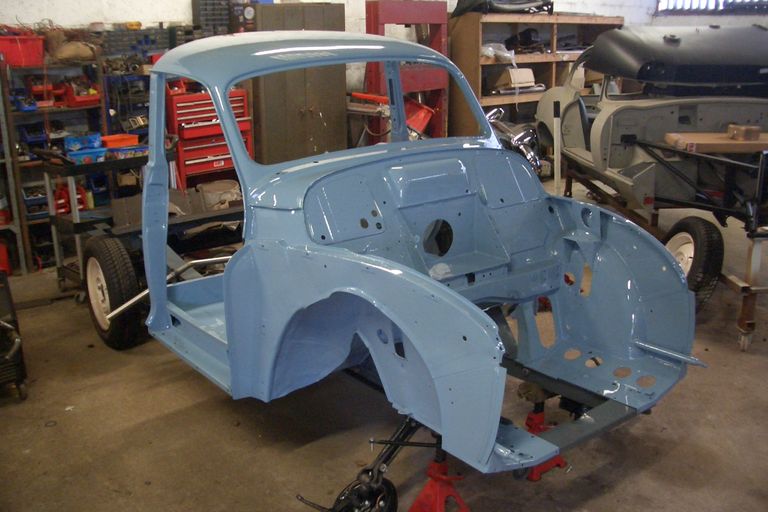
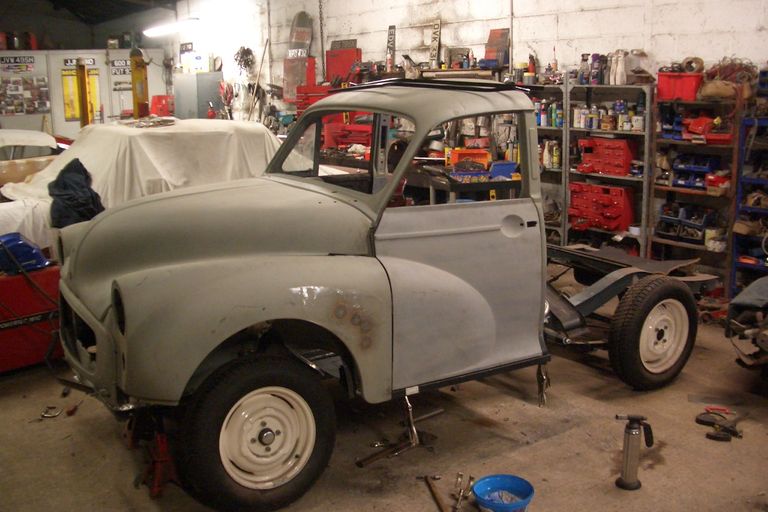
Now we are getting somewhere. Pretty colour chosen by the owner and time to start putting it together. It shouldn't be difficult should it, I mean there's barely anything in one!

As you can see, I'm still not thinking about the back body! I pushed the build as far as possible and here we have a running driving chassis/cab. Looks great but there's no ignoring it now - time to do the back.
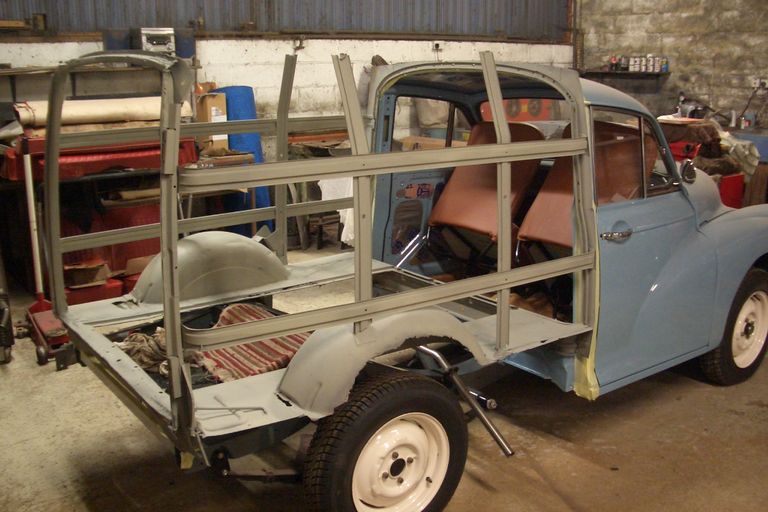
One of the major suppliers began selling the fibreglass van bodies (available in the 90s) again so it was decided that this could be the solution to our problem. A decision I would question later on.... Here is the salvaged remains of the inner structure and floor of the original .

And in the end most of that was unuseable. I kept the right side floor and wheelarch (although they both needed a lot of repair) and the side lattice frame which needed new ends on all of the sections. It also got new front and rear crossmembers, new left side floor and wheelarch and the whole frame around the rear doors was ruined with rot and awful repairs.
Reconstructing the rear door frame was a challenge. So little left to work with and a lot of guesswork. I welded the rear doors together to give a solid jig for the aperture and hinge positions. Slowly, bit by bit it came together.
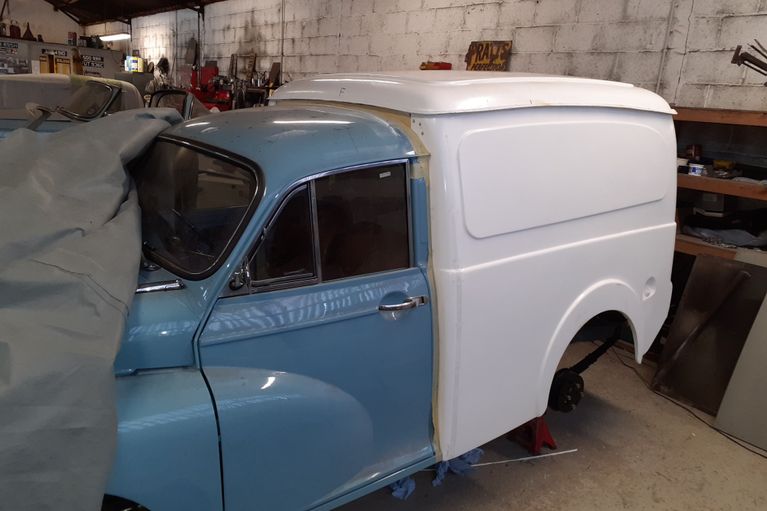
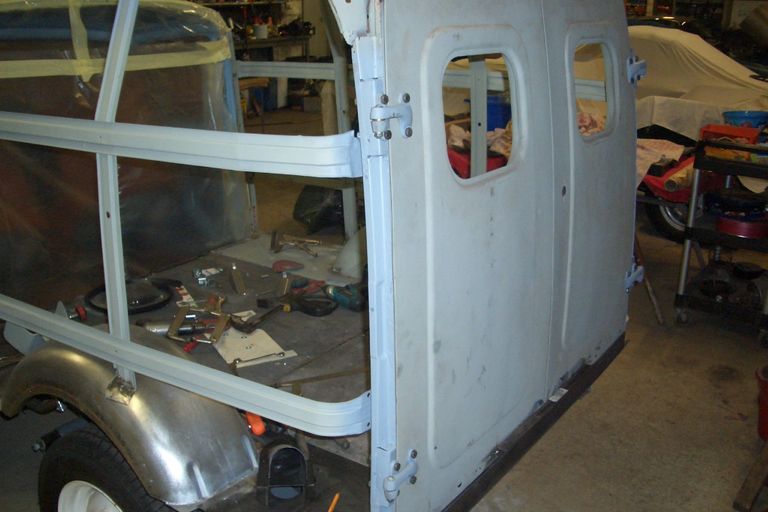
Building the fibreglass back was a lot of work. They didn't exactly fit together or fit the frame and required a lot of work to get them right. It seemed to take weeks of trimming, fitting, removing, refitting, bonding. And there were areas which the fibreglass didn't replace such as the bit above the cab roof which had to be made in steel and bonded /riveted to the back. I was very pleased when it was all over.
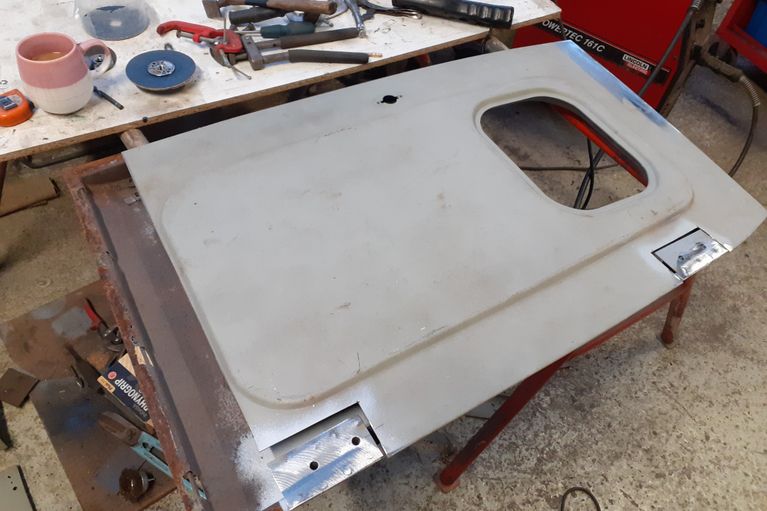
I knew the rear doors needed work as they were both dented and rotten along the bottoms. The real unexpected hiccup was that the fibreglass side panels wrapped around the rear door aperture, in effect reducing the size of it by 6mm or so - that's your door gaps gone. So as well as repairing the rotten bottoms....
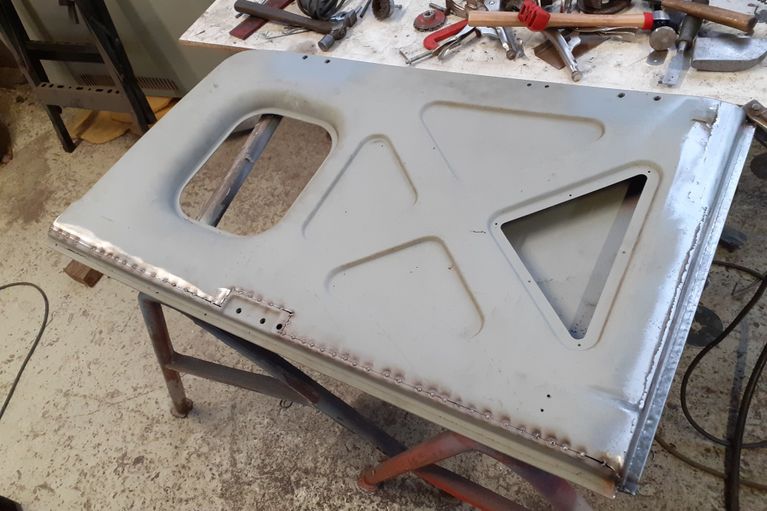
I also needed to make the doors fit the aperture. The attachment point for the hinges were repositioned nearer to the edge so there was now an acceptable gap between the door edge and the aperture. But this has now pushed both doors closer together to the point where they overlap! So the left side door (without the locking mechanism etc) had a slice removed from it making it a bit narrower.

And this is what I ended up with. Ah thank goodness! But you see why I was questioning the decision to go fibreglass.
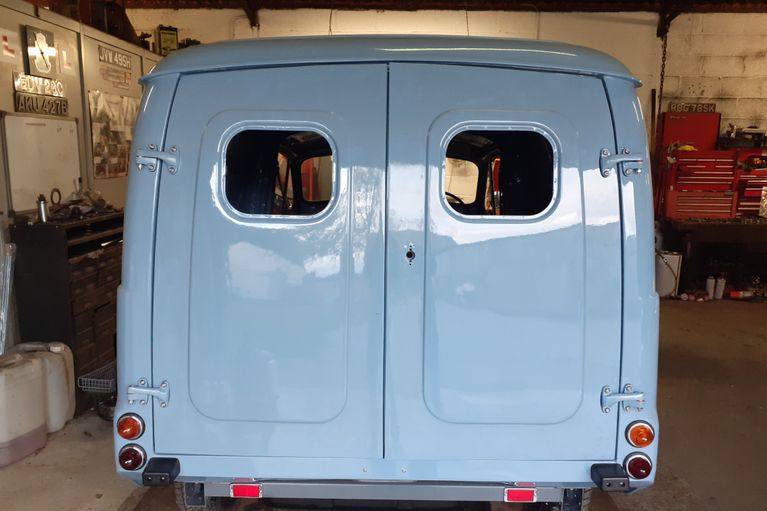
Honestly you'd do well to tell it's not steel from the outside and the time spent assembling it has resulted in a very strong structure. Starting to add the glitter here with the lovely Lucas beehive lights.
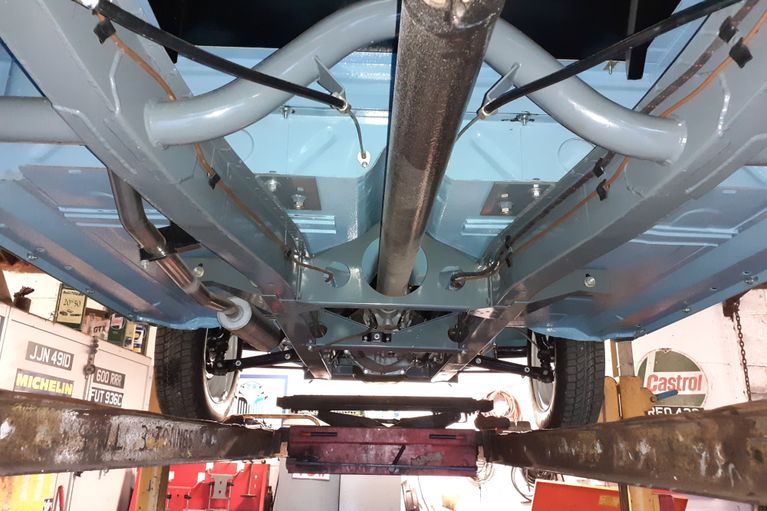
Looking spotless underneath. The grey chassis looks very tasteful against the blue.
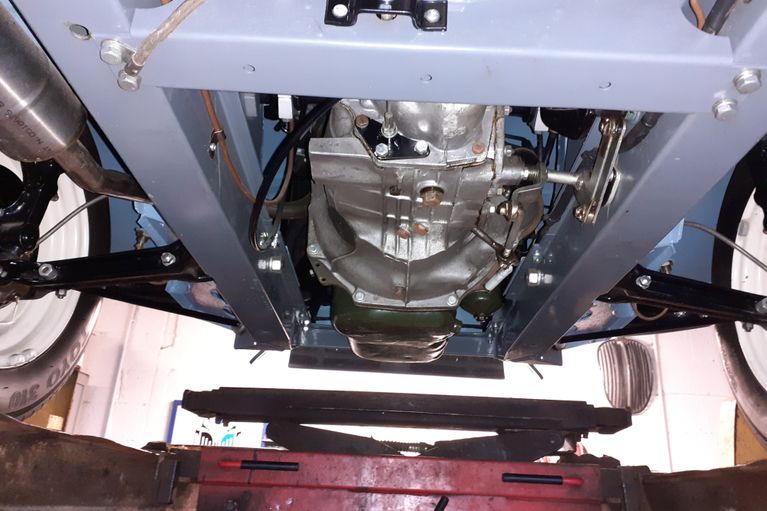
It's all been kept virtually standard with just simple upgrades. Poly bushes, stainless brake hoses, electronic ignition etc - the usual stuff. Note the vulnerable sump on Moggies. Those with lowered suspension be careful as you can catch it easily. Also the crazy wiring loom and brake pipe route which loop under the gearbox crossmember and are also vulnerable. It's not difficult to re route them through the crossmember cut out and above the clutch linkage.
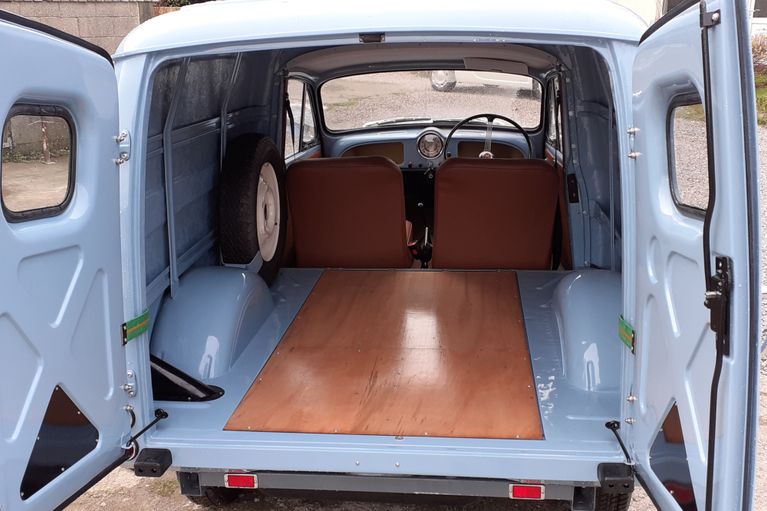
Does look nice in there though doesn't it. I know the floor boards should be black (they are underneath) but they look nice just lacquered and the cab is trimmed much nicer than it was originally.

This is a 1957 van and was originally very basic. This one had no indicators, heater or anything so adding those was a necessity really. I probably should have fitted the earlier front side/indicators but the wings came with it and at times I felt a desperation to re use something! This is a lovely van now, a barely believable transformation.
© Copyright 2020 Willow Triumph Ltd. All rights reserved.